Installing "unavailable" apps on Bluefin / Aurora / Bazzite
A worked example: getting Brave (the Origin build) running as a first-class desktop app by putting it in a Distrobox Ubuntu container and exporting it back to the host. I'll show the Containers GUI as the main path and drop in the equivalent CLI commands as I go.
Contents
1. Overview
Bluefin, Aurora, and Bazzite are
image-based (immutable) Linux distributions built on Fedora Silverblue / Kinoite.
Because the root filesystem is read-only, you can't install packages with
dnf install the traditional way. Typically, Flatpaks are
recommended for GUI apps while homebrew packages are recommended for CLI apps. But
sometimes a Flatpak is not available. For the Fedora Atomic distros, you could
perhaps use rpm-ostree to install packages but that is not supported and is, in fact, actually
discouraged in the Universal Blue images (Bluefin/Aurora/Bazzite). In the case of
Brave which I am using as my example here, it isn't available in the ostree layered
image anyway.
Distrobox is the way out. It spins up a normal, mutable container (Podman under the hood) running whatever distro you like. Inside it you have a plain old package manager, and once the app is installed you can export it back to the host so it shows up in your app launcher, dock, and Alt+Tab like anything else. The app runs inside the container but draws on your real display, so you'd never know the difference.
ℹ️ What we're actually doing
Create an Ubuntu container, run Brave's official one-line install script inside it,
then run distrobox-export (or click a toggle in the GUI) to drop a
.desktop launcher on the host. That's the whole trick — the rest of
this page is just the specific clicks and commands.
ℹ️ GNOME or KDE Plasma — same steps
My screenshots are from GNOME (Bluefin), but none of this is desktop-specific. On KDE Plasma — Aurora, or the KDE flavour of Bazzite — the Distrobox and Brave steps are identical; the only differences are cosmetic, like which launcher the app exports into and where its icon lands. I'll call out the handful of Plasma-specific notes (such as logging out to see the new launcher) as they come up.
⚠️ Before you start
- Bluefin, Aurora, or Bazzite (any recent release)
- An internet connection (I mean… you're installing a web browser here, right? ;) )
distroboxandpodman— already there on all three images- Five or ten minutes, most of it spent waiting on a download
2. Create the container
There are two ways to do this: type a few commands, or click through the Containers app (DistroShelf) that Bluefin and Aurora ship. I'll show both — but I'll be honest about which one I'd reach for.
CLIThe easy way
Honestly, the whole thing is five commands. Open a terminal and run:
# on the host: create the box and step inside
$ distrobox create --name ubuntu --image ghcr.io/ublue-os/ubuntu-toolbox:latest
$ distrobox enter ubuntu

# now inside the container: install Brave, add audio, then export to the host
$ curl -fsS https://dl.brave.com/install.sh | FLAVOR=origin sh
$ sudo apt-get install -y libpulse0        # so browser audio works
$ distrobox-export --app brave-origin
That's genuinely it — create the box, step in, run Brave's installer, add the audio library,
export the launcher, and Brave Origin lands in your app menu a moment later. That
libpulse0 line is easy to skip but you'll want it: without it the browser runs fine
but plays no sound (see troubleshooting). Prefer a stock Ubuntu image? Swap
in --image ubuntu:26.04; just note the bare image doesn't ship curl,
so run sudo apt-get install -y curl first.
😆 Want to do it the hard way?
If you'd genuinely rather avoid the terminal and click your way through the GUI instead, read on — the rest of this section (and the next two) is the exact same steps, one screenshot at a time. No judgement. (Okay, a little judgement.)
GUIThe hard way (the Containers app)
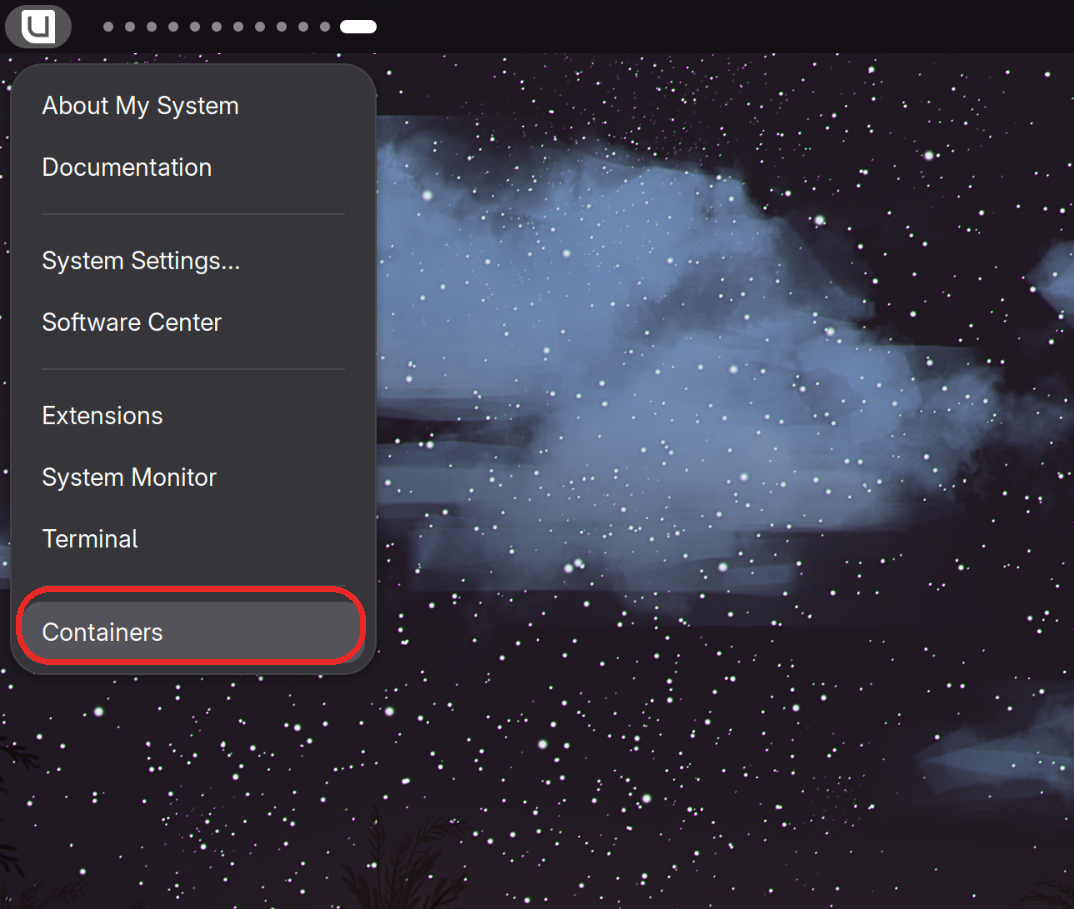
Open Containers from the system menu.
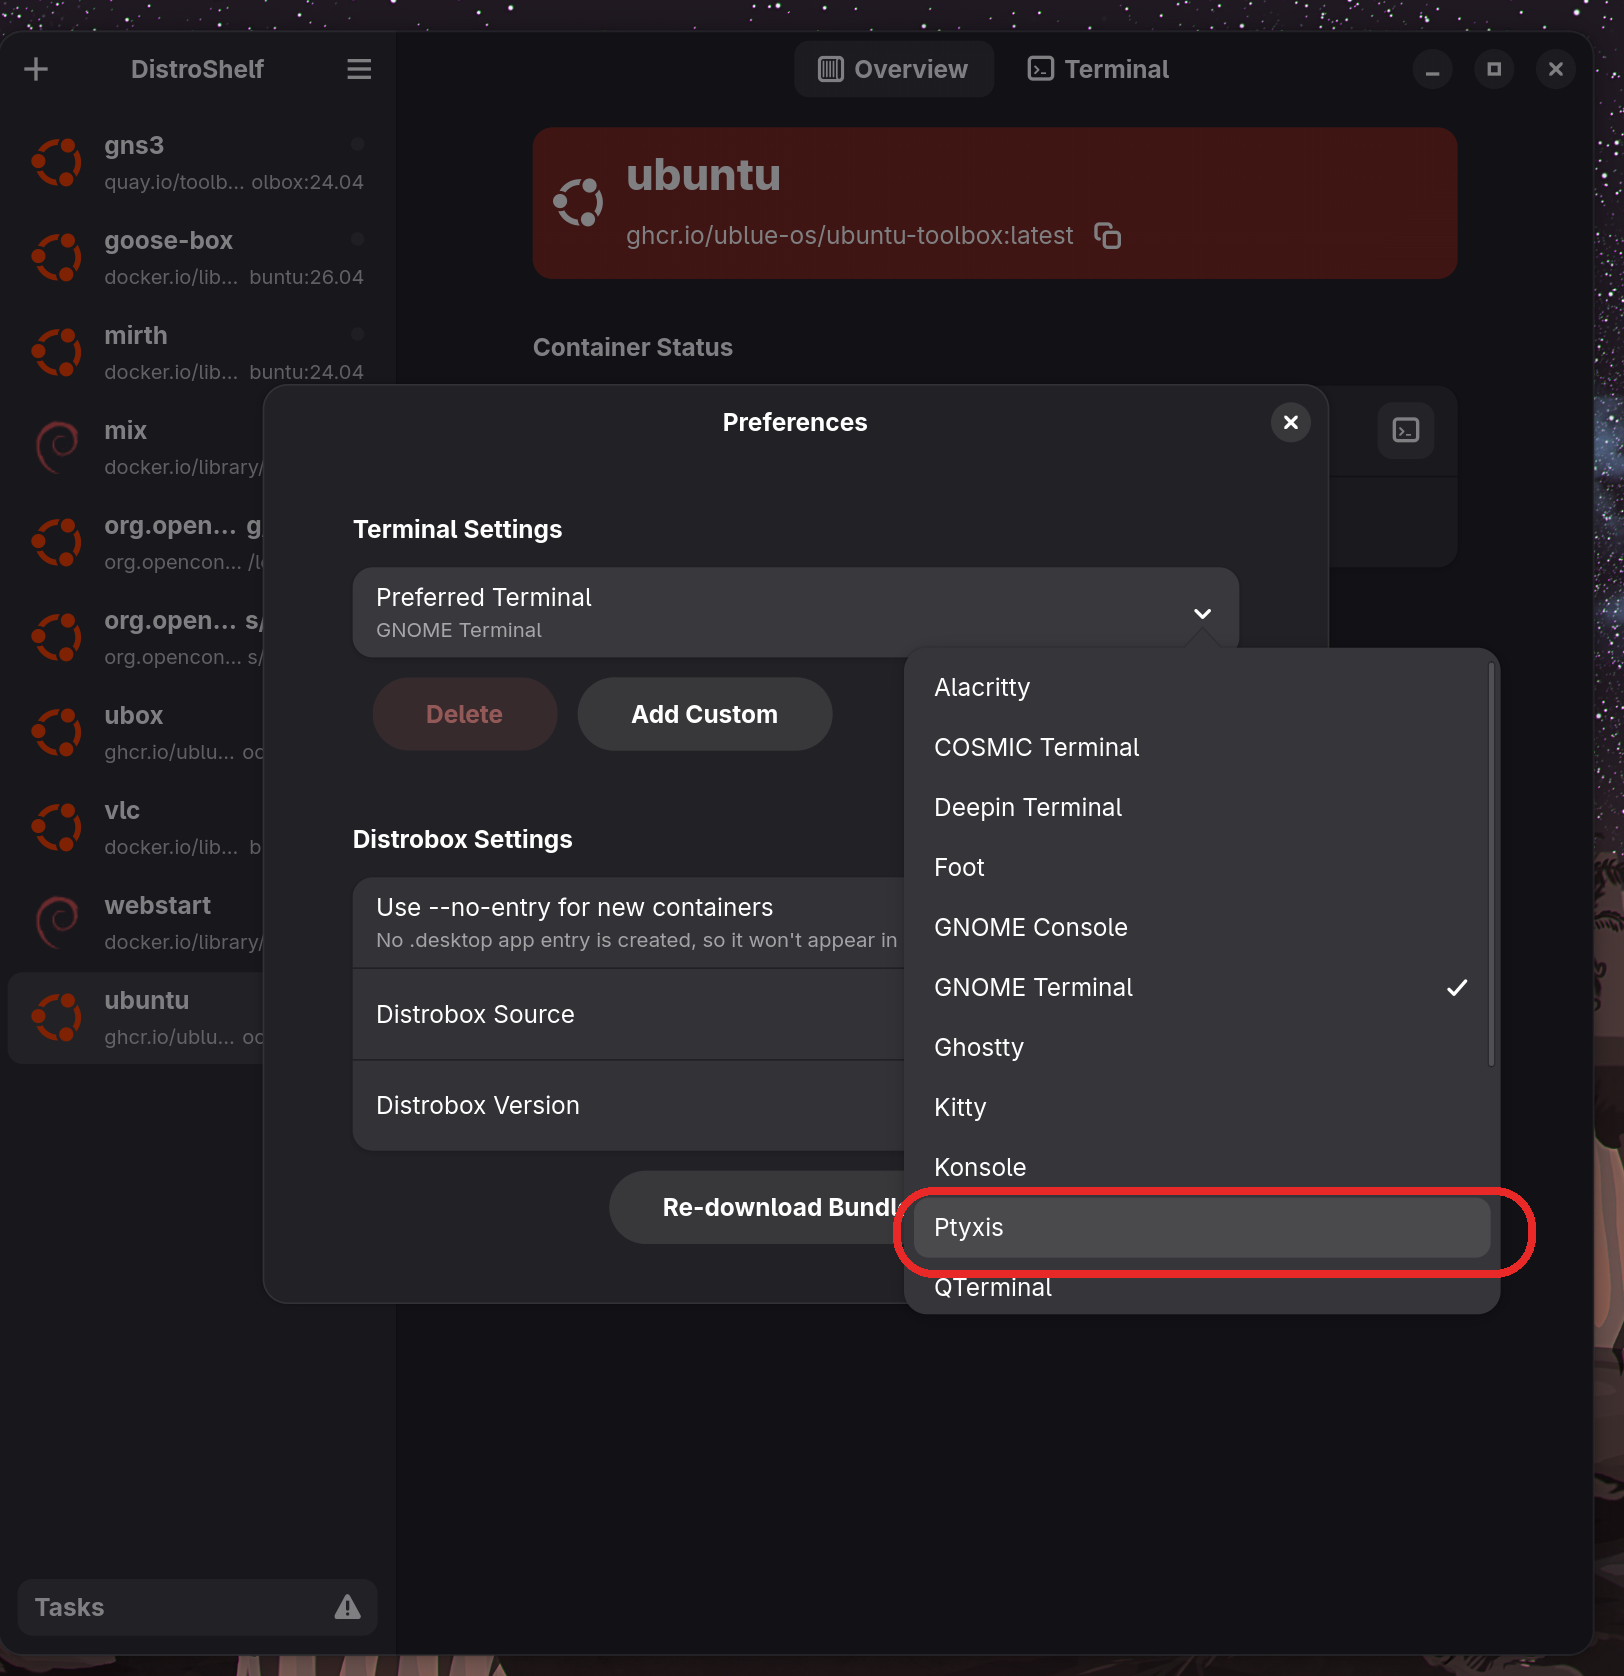
Fix one setting first, because the default is wrong. The app's Preferences → Preferred Terminal ships set to GNOME Terminal, which none of these images actually include — so later, when you click Terminal to enter the box, nothing happens. Open the menu (☰) next to the DistroShelf title → Preferences and set Preferred Terminal to Ptyxis, which is what Bluefin, Aurora, and Bazzite all ship. Do it now (you can't reach Preferences once the create dialog is open) and the Terminal button will work when you need it.
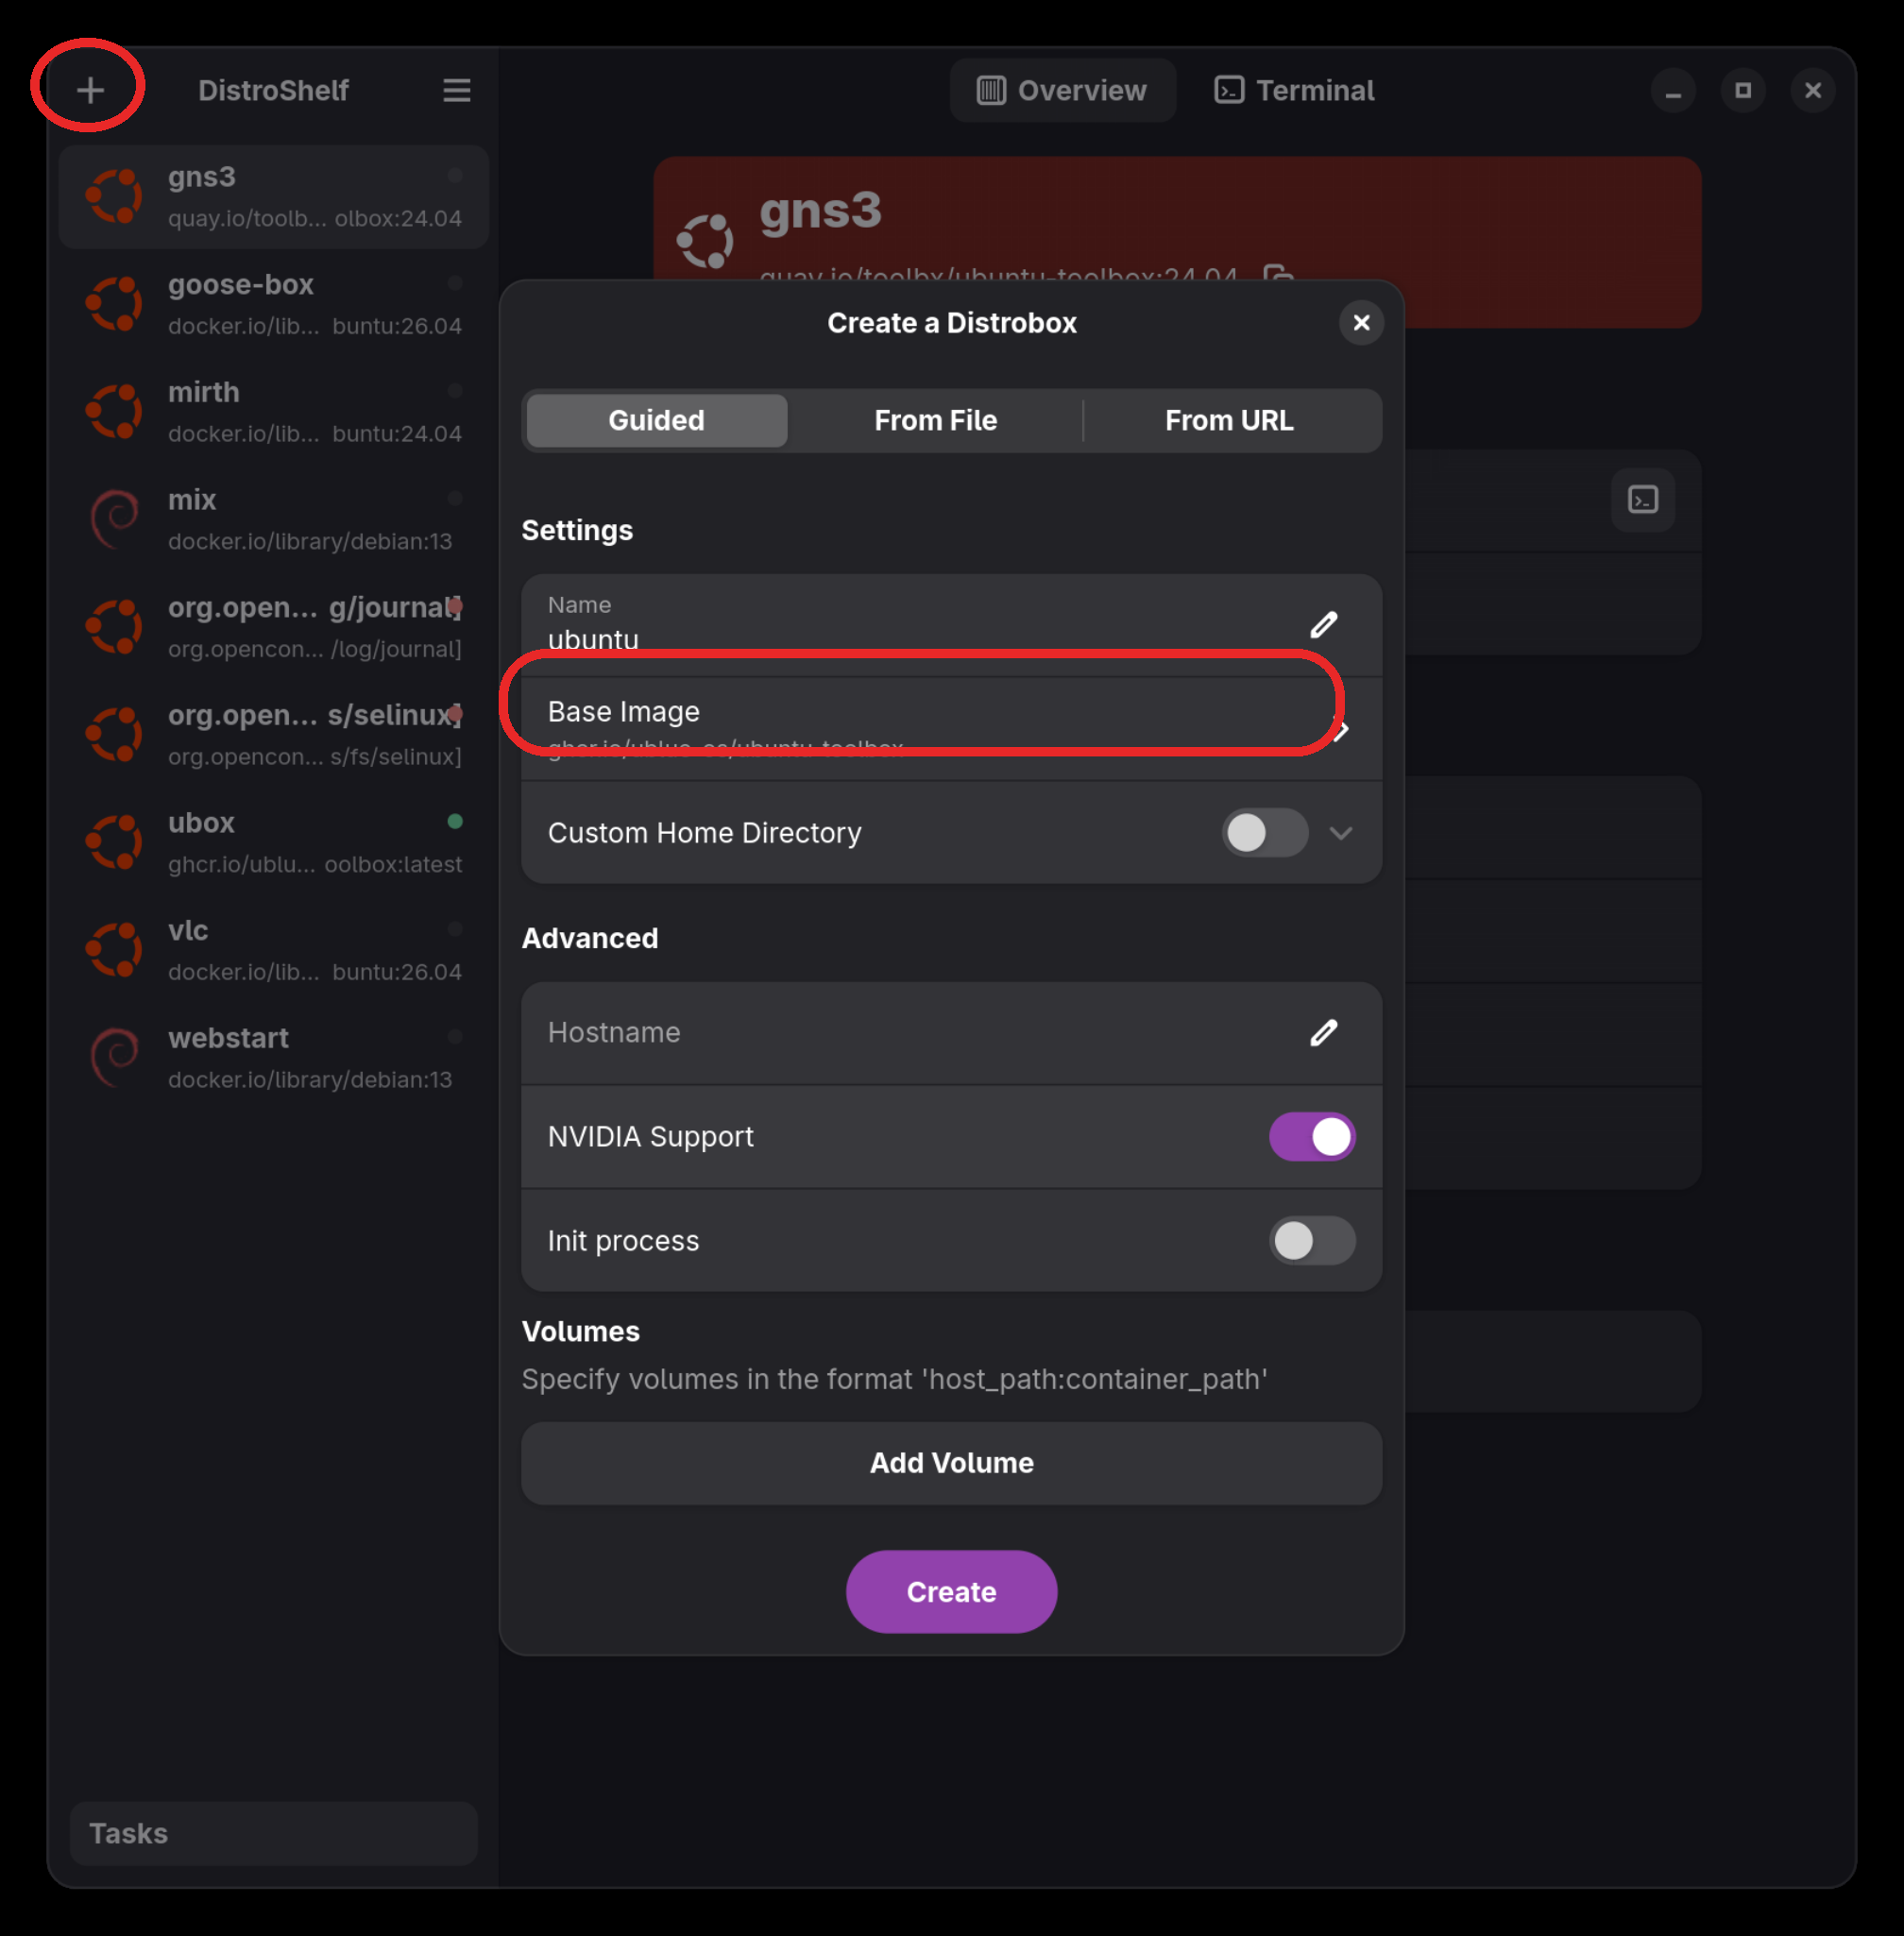
Click + (top left) to open the guided Create a Distrobox
dialog. Give it a name — I called mine ubuntu — and leave the rest
at their defaults. (I flipped NVIDIA Support on because I have an NVIDIA
card; skip it if you don't.) Then tap Base Image to choose the distro.
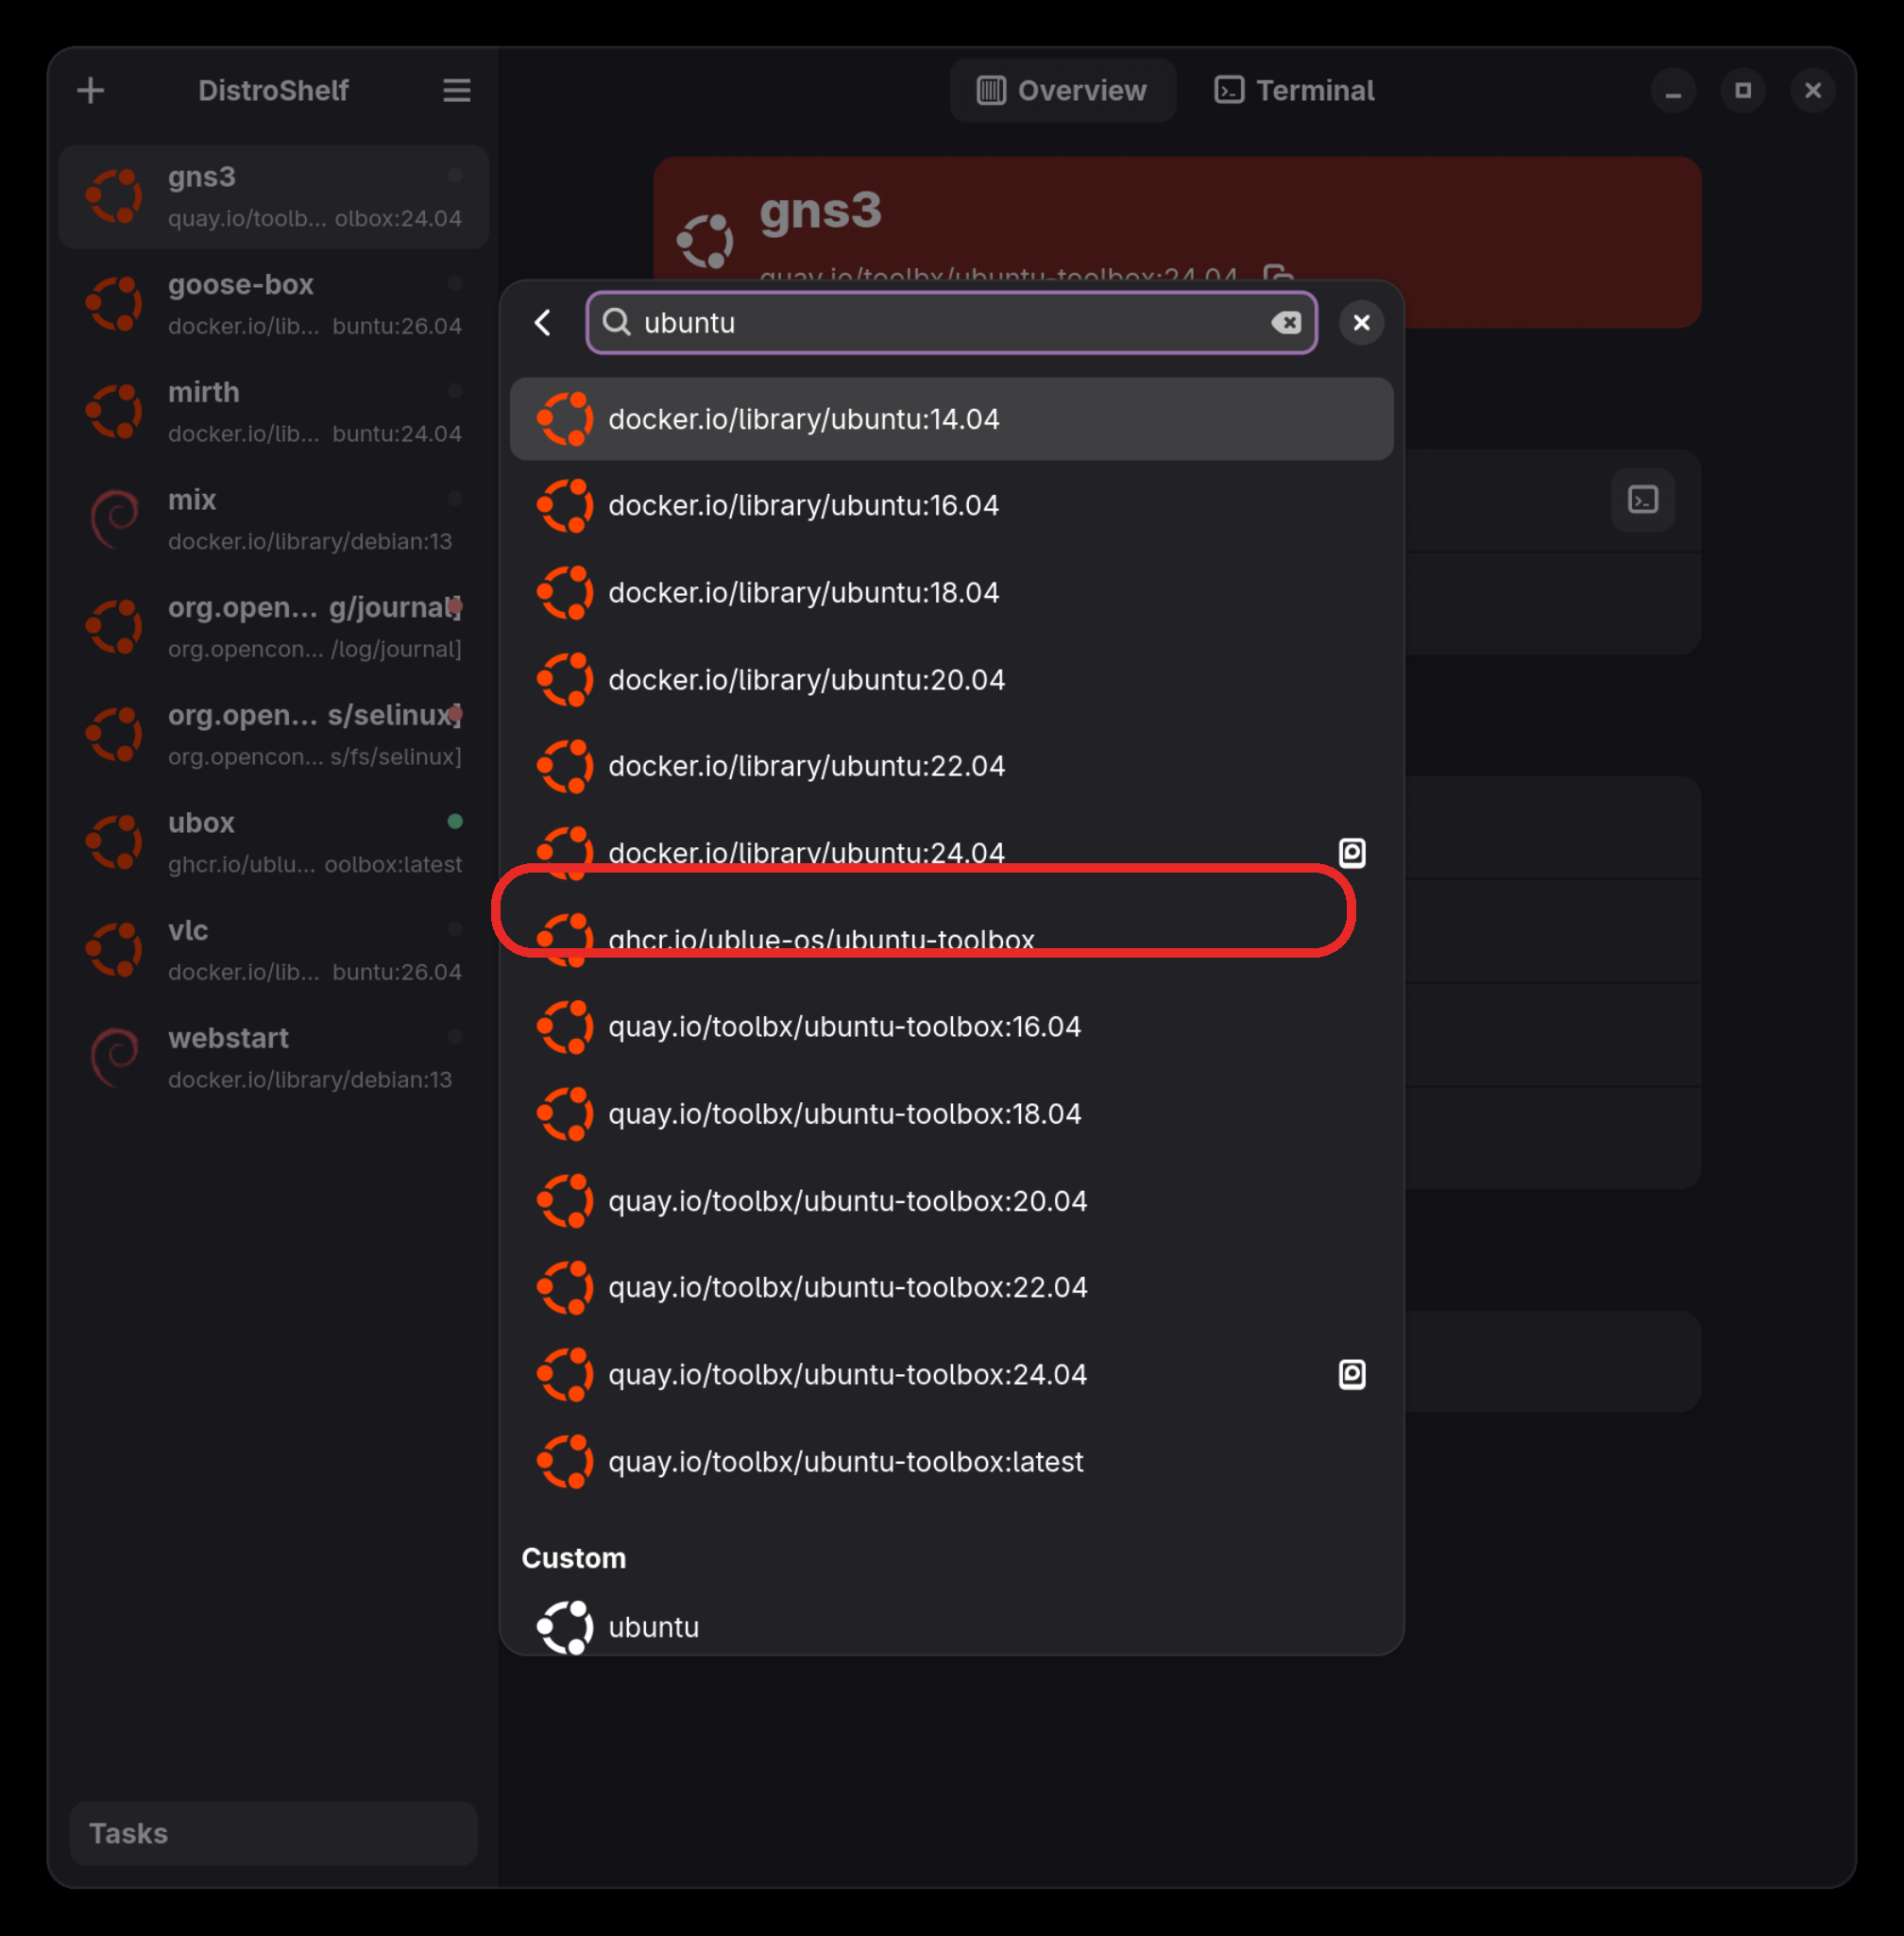
Search for ubuntu and pick a current image. I want the latest Ubuntu, not an
old LTS, so I use the Ubuntu toolbox image (ghcr.io/ublue-os/ubuntu-toolbox) —
it tracks the newest Ubuntu release and comes with curl and the usual niceties
already baked in. Plain ubuntu:26.04 works too. Select it and you're back at the
create dialog with that image set.
⚠️ Don't grab 24.04
The predefined list tops out at ubuntu:24.04. That still works, but
it's a release behind. Use the toolbox image (latest) or type
ubuntu:26.04 into the custom field so you're on current packages.
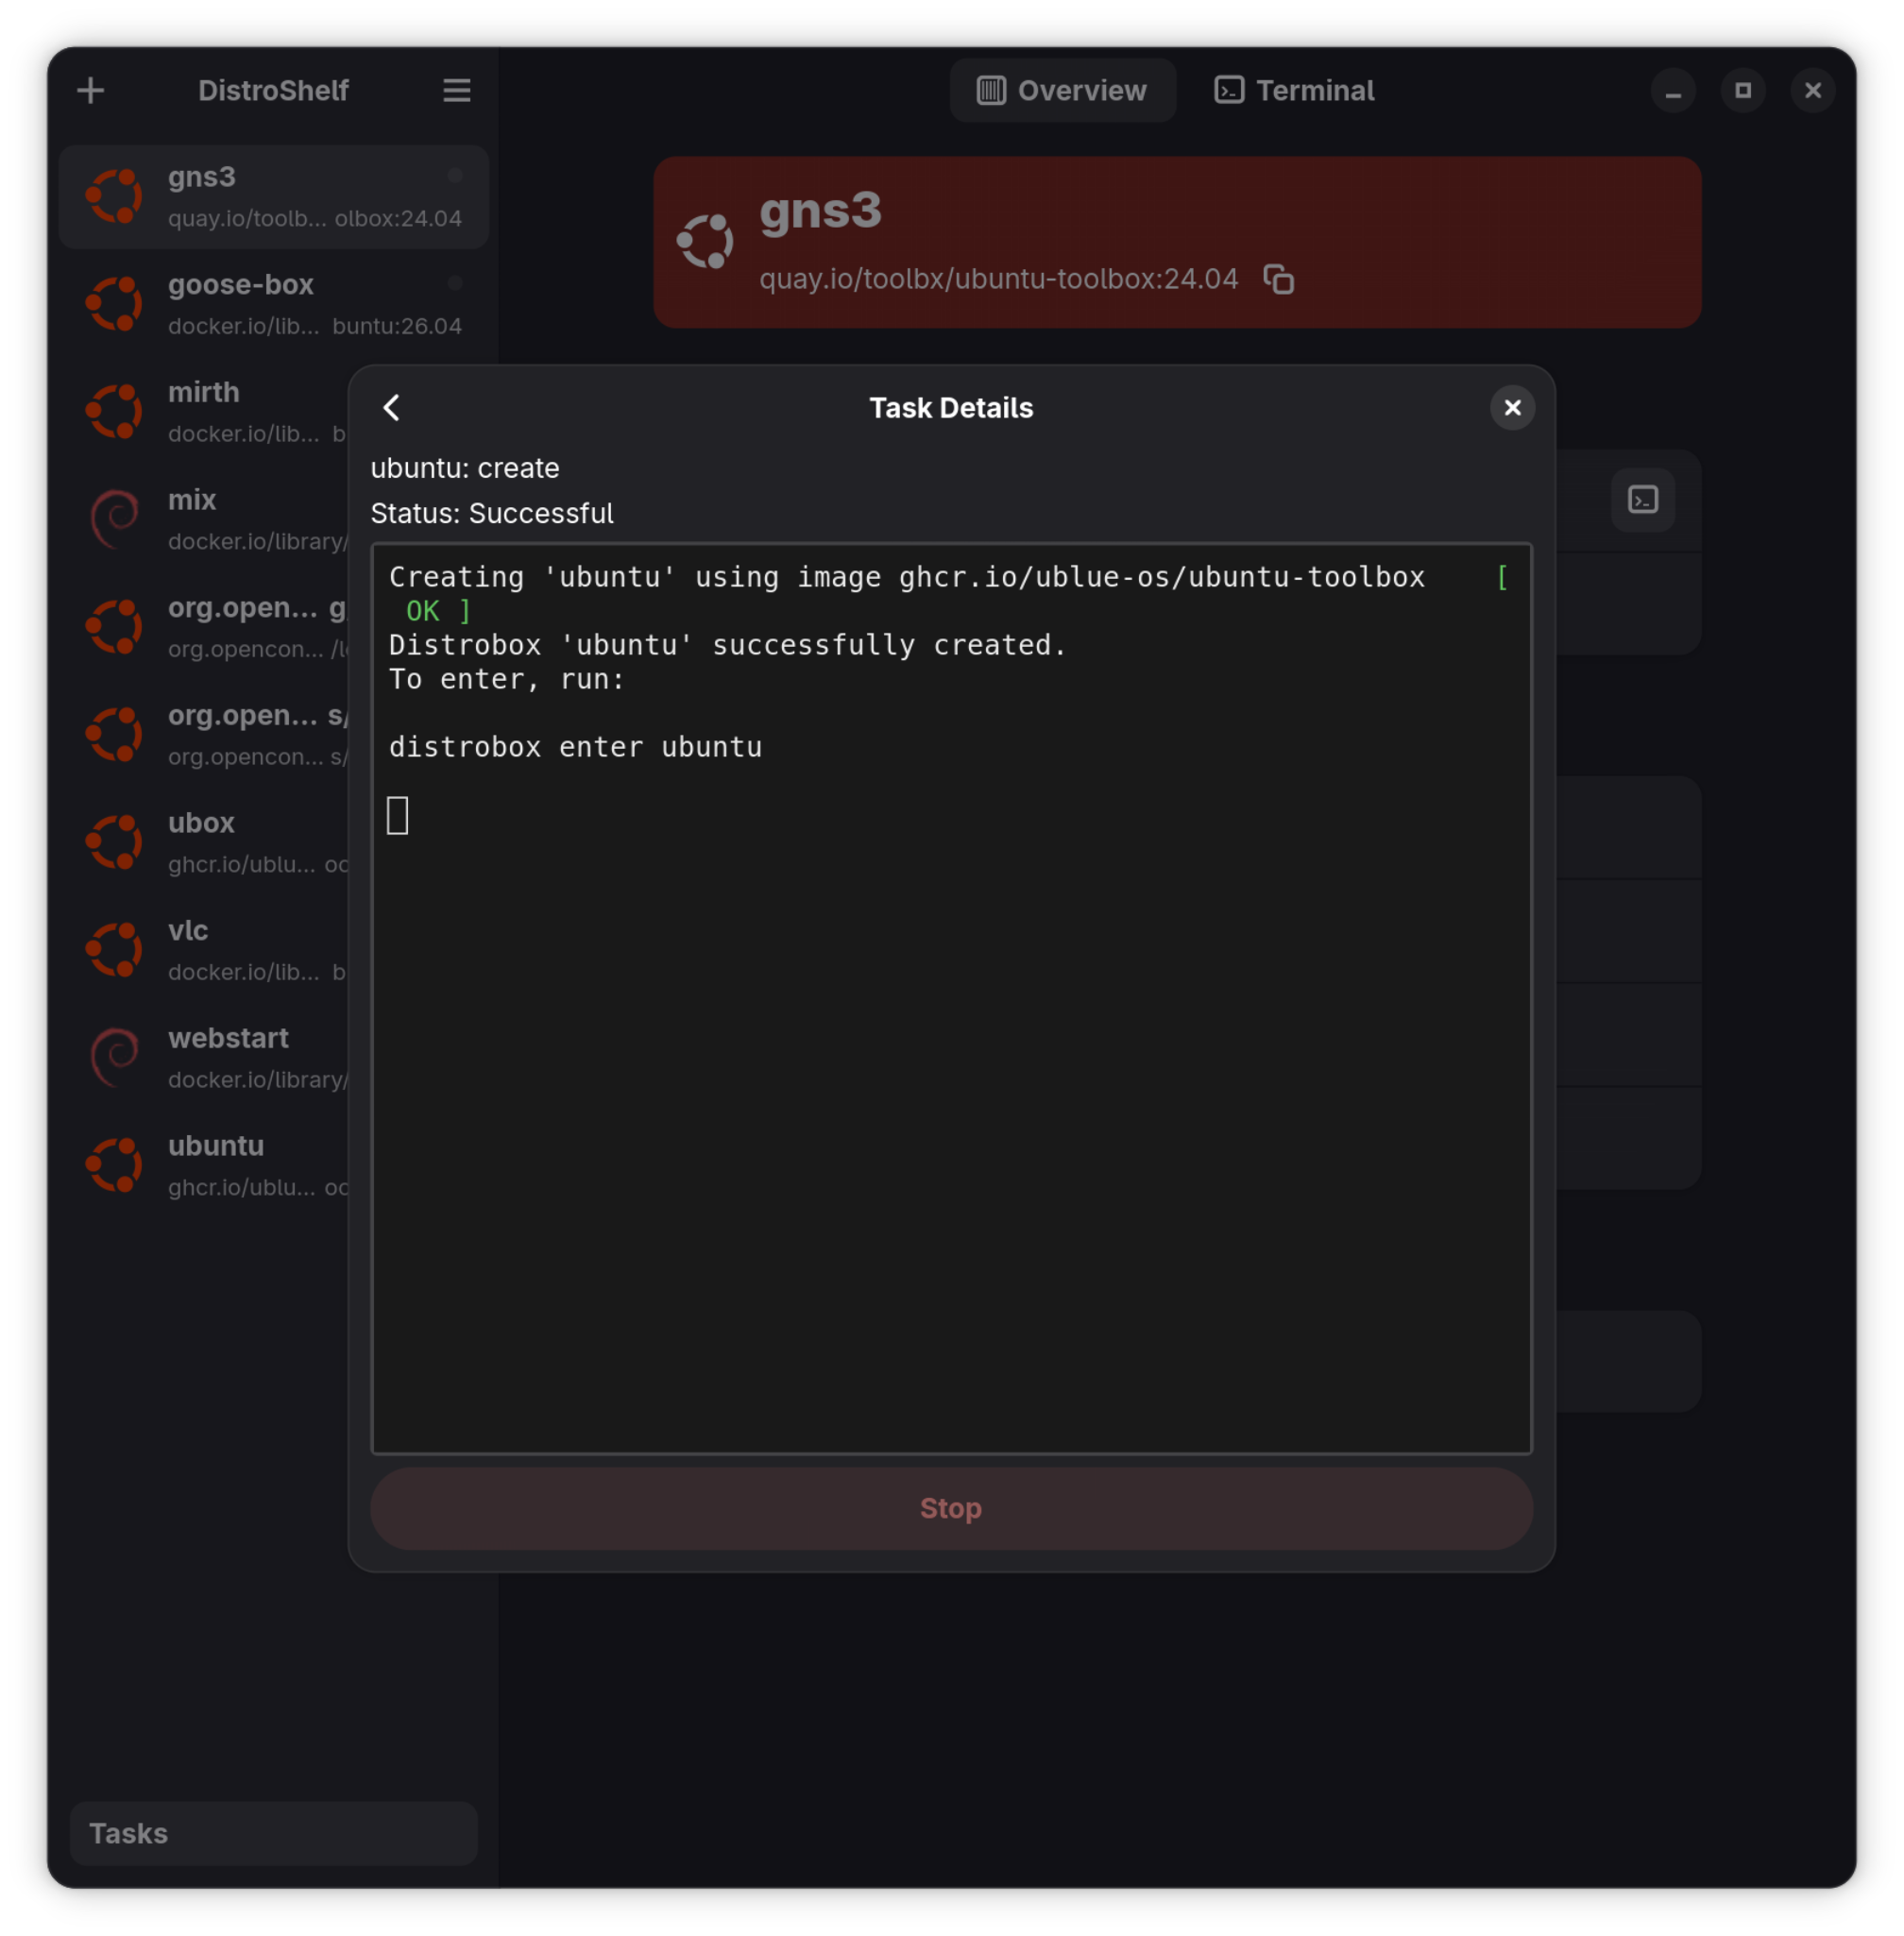
Back in the dialog, hit Create. Distrobox pulls the image and sets the box
up; when it's done you'll see the task marked successful, and it tells you how to enter it
from a terminal (distrobox enter ubuntu).
Select the container and you land on its Overview. This is command central: a Terminal button to jump inside, Applications for exporting apps to the host (we'll use that later), Upgrade Container, and a Danger Zone if you ever want to delete it.
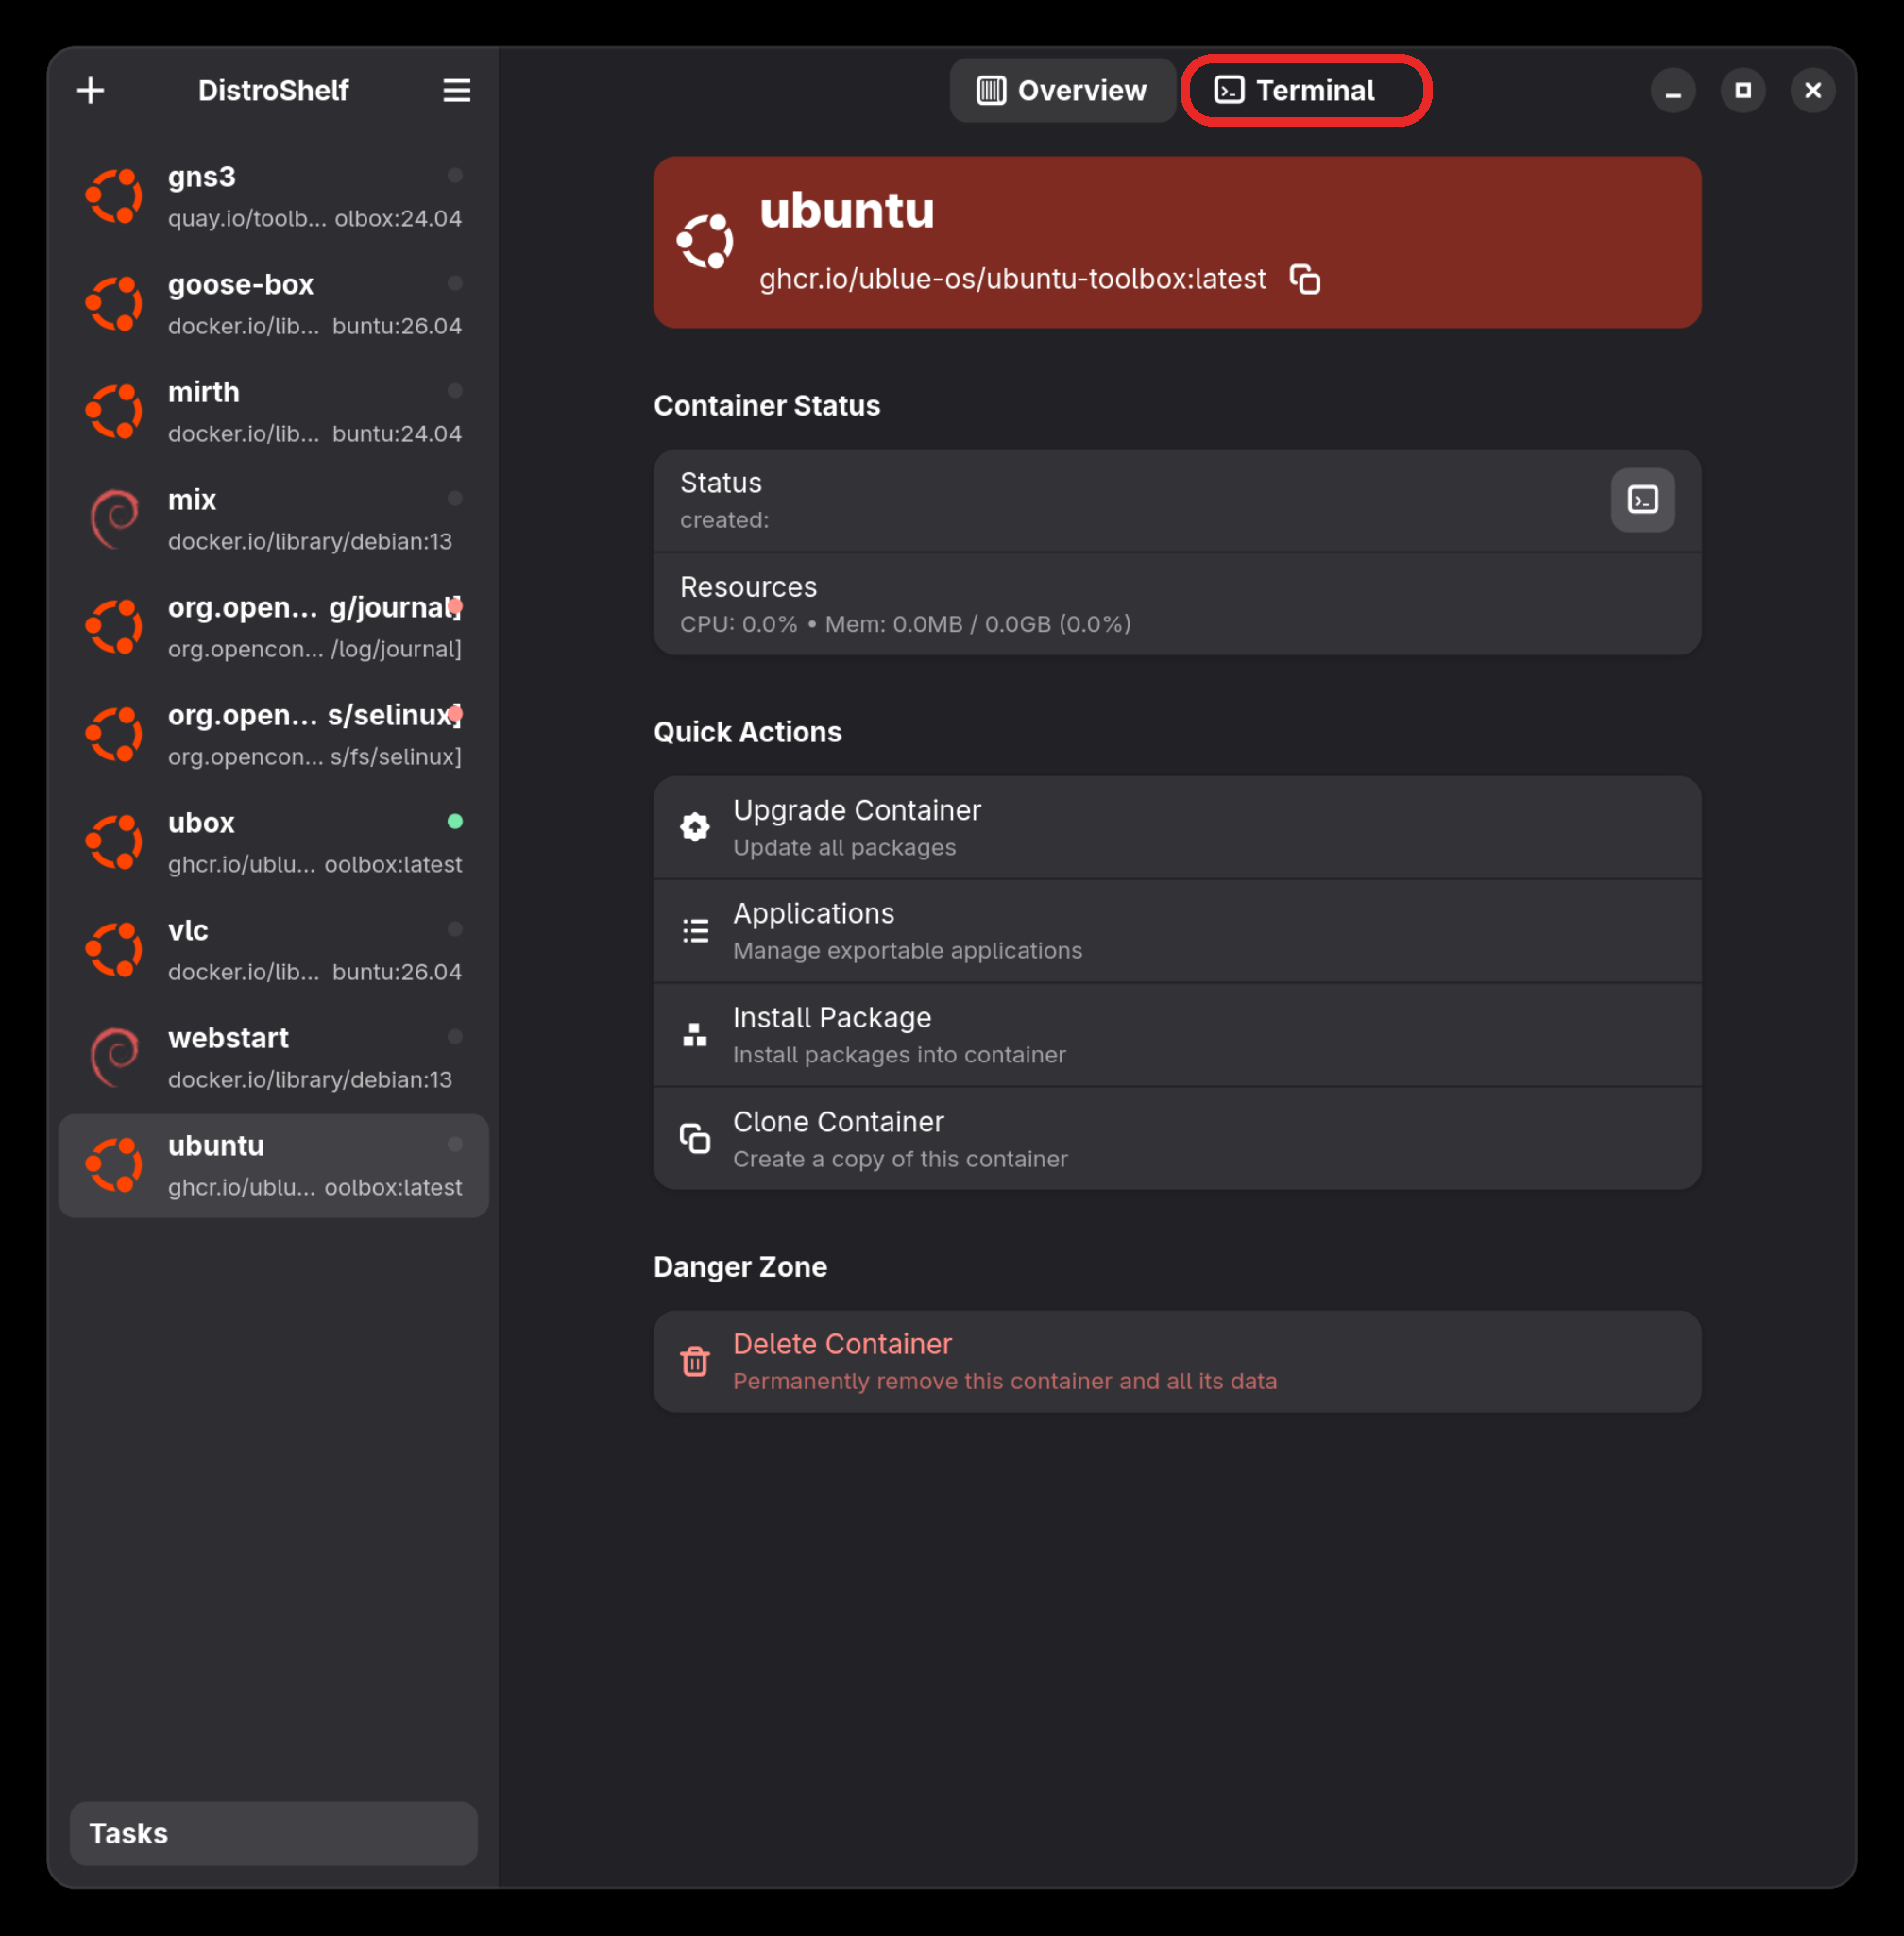
ubuntu container's overview and quick actions.
With that set, click Terminal to drop into the box. The first time, it runs
through its setup and leaves you at a shell prompt inside the container — notice it
changes to [john@ubuntu ~]$. From here you're in exactly the same place the CLI
path landed: install Brave (next section), then export it.
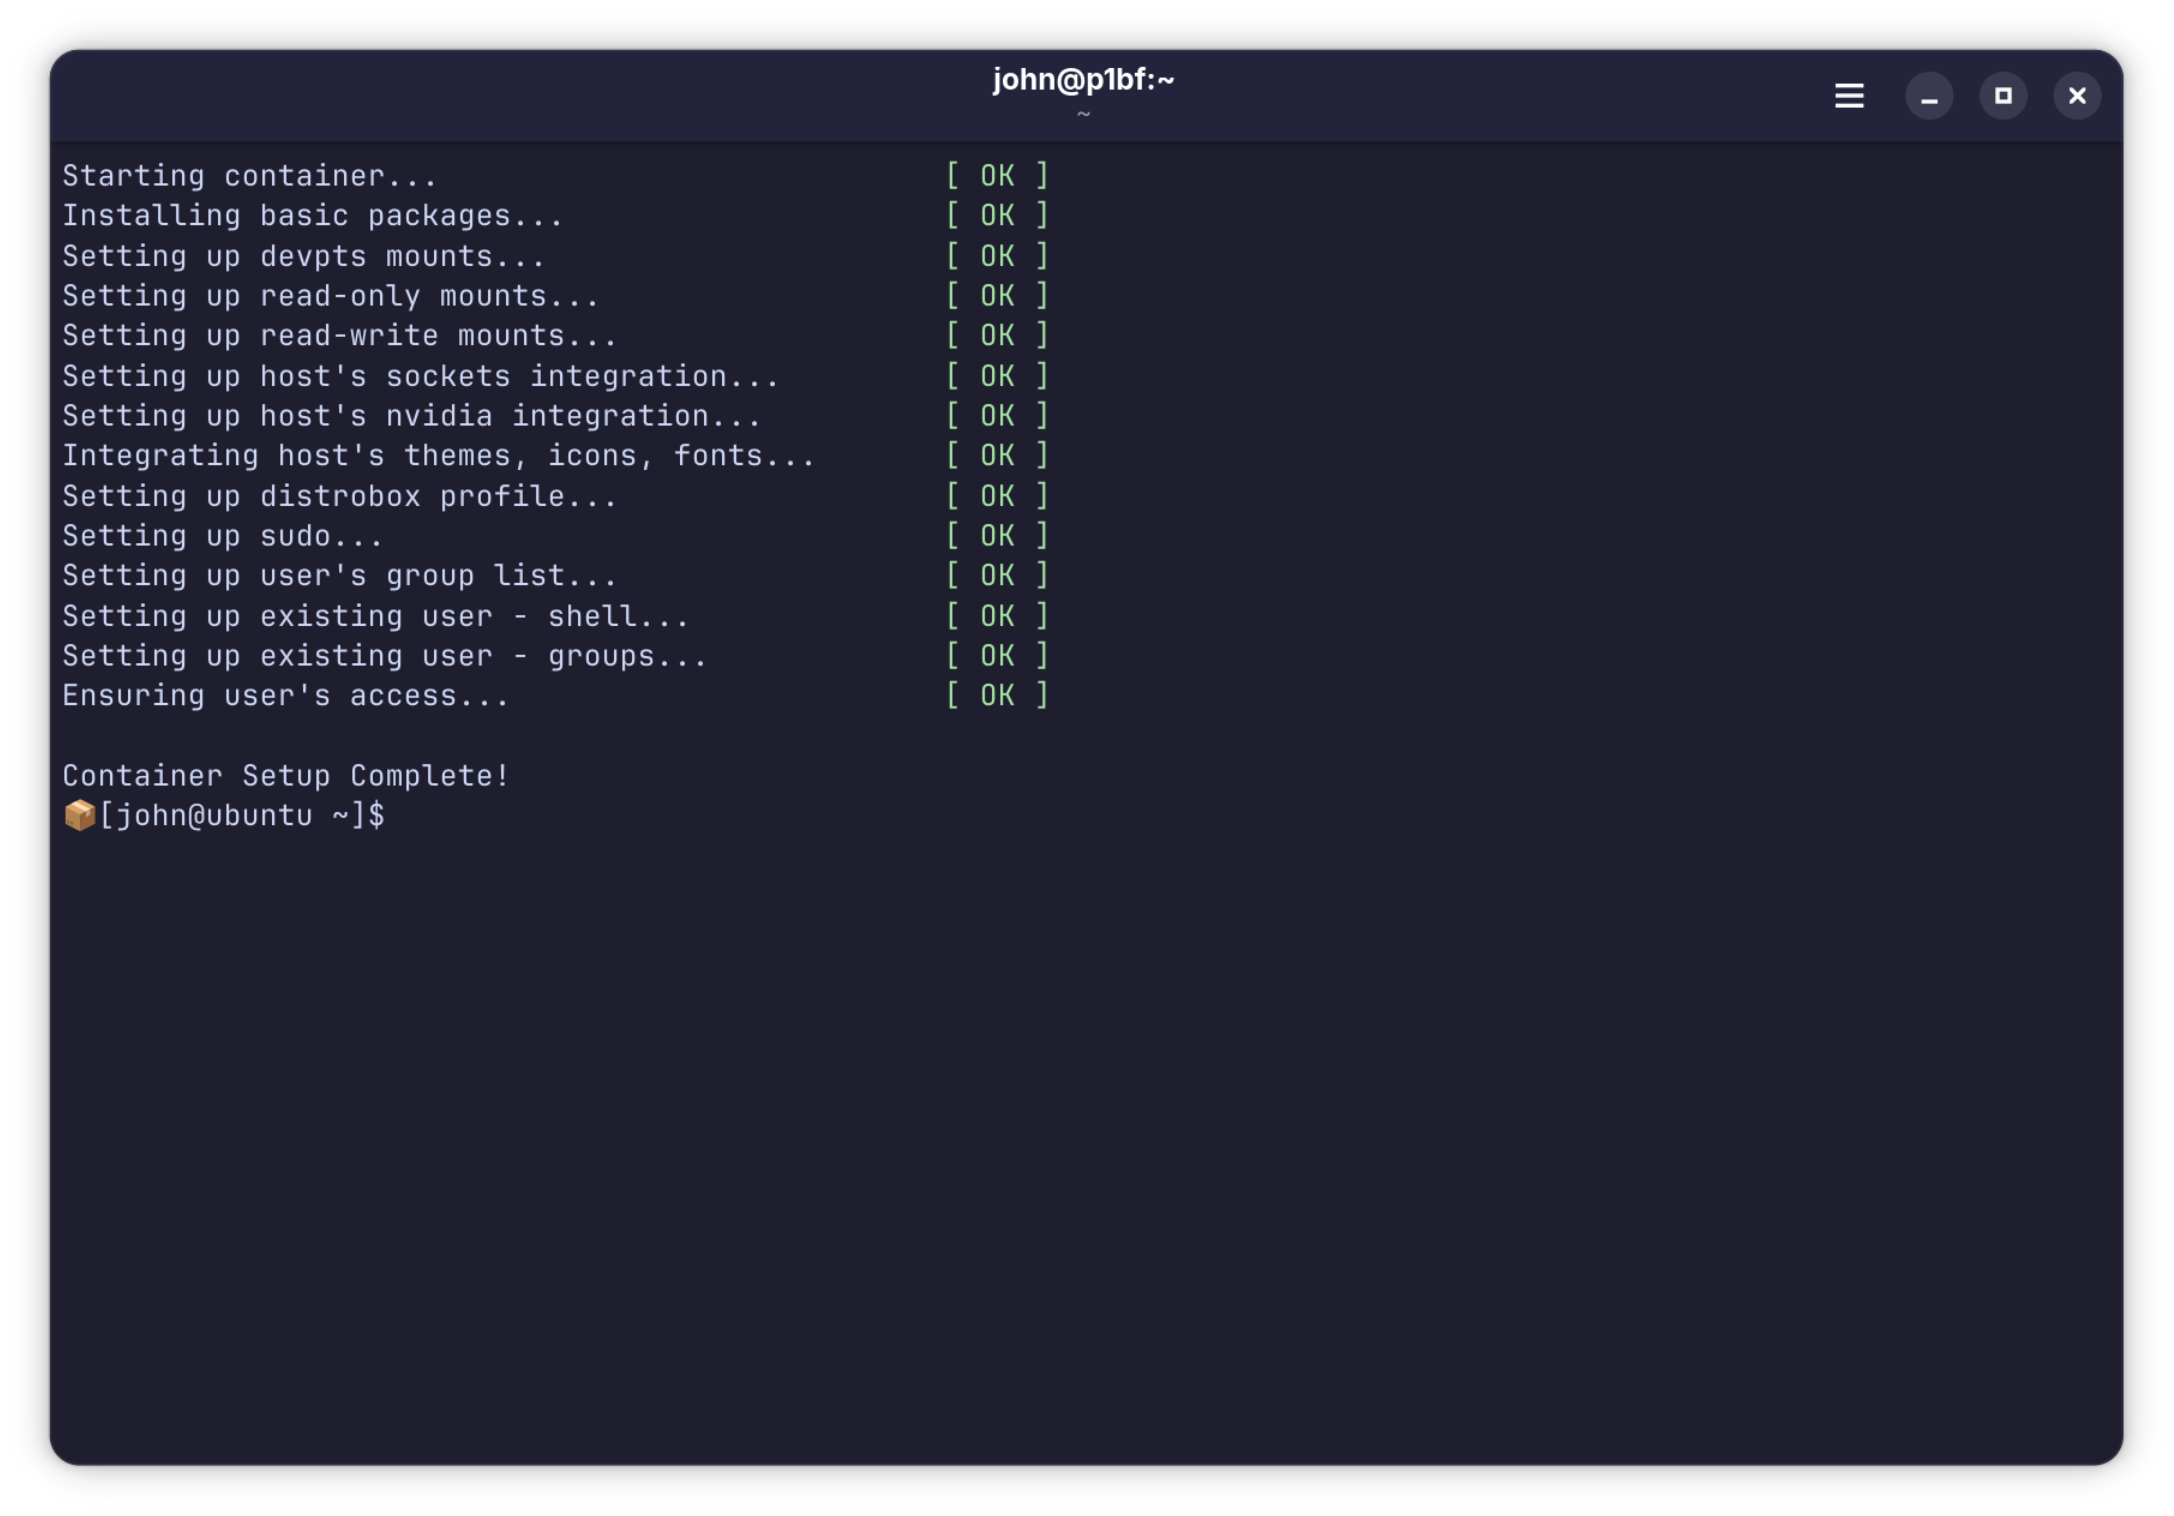
[john@ubuntu ~]$.3. Install Brave with one command
Everything from here runs inside the container. Brave publishes a one-line installer that adds their APT repo, imports the signing key, and installs the package for you, so there's no manual key-and-repo dance anymore. Their download page hands you the exact command:
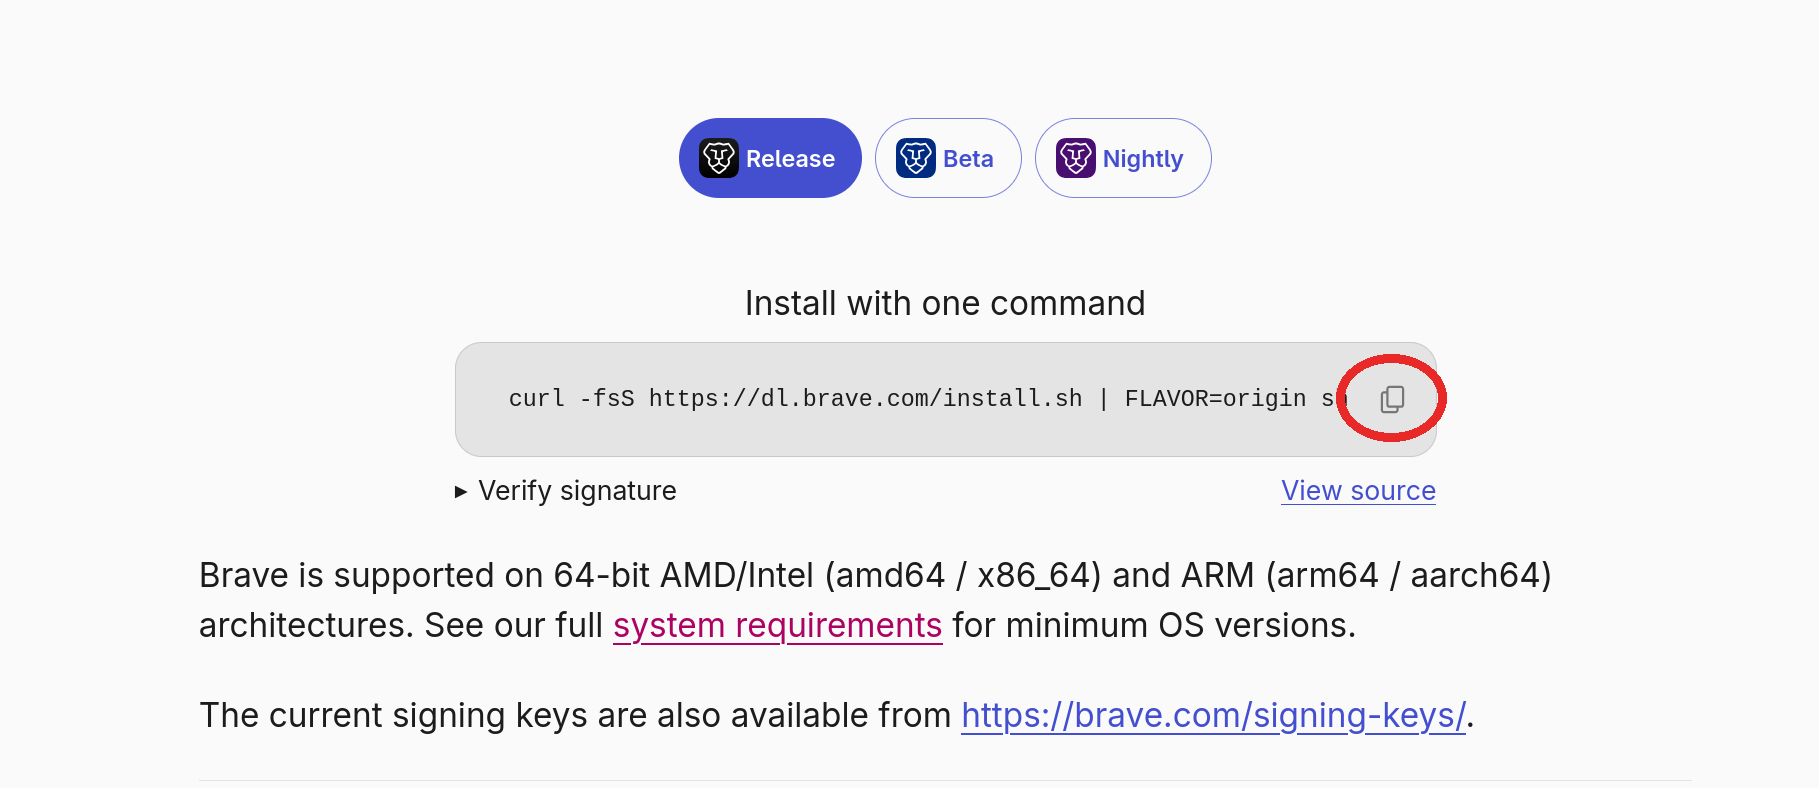
FLAVOR=origin bit selects the Origin build.ℹ️ This isn't really about Brave
I'm using Brave's install script because Brave is what I wanted, but the container is just a
normal Ubuntu system — anything in the archives is one command away:
sudo apt-get install neovim, sudo apt-get install gimp, whatever
you need. Based your box on Fedora instead? Then it's sudo dnf install <package>.
The Distrobox-and-export trick is identical no matter what you install; Brave just happens to
be the example.
Paste it into the container shell and run it:
$ curl -fsS https://dl.brave.com/install.sh | FLAVOR=origin sh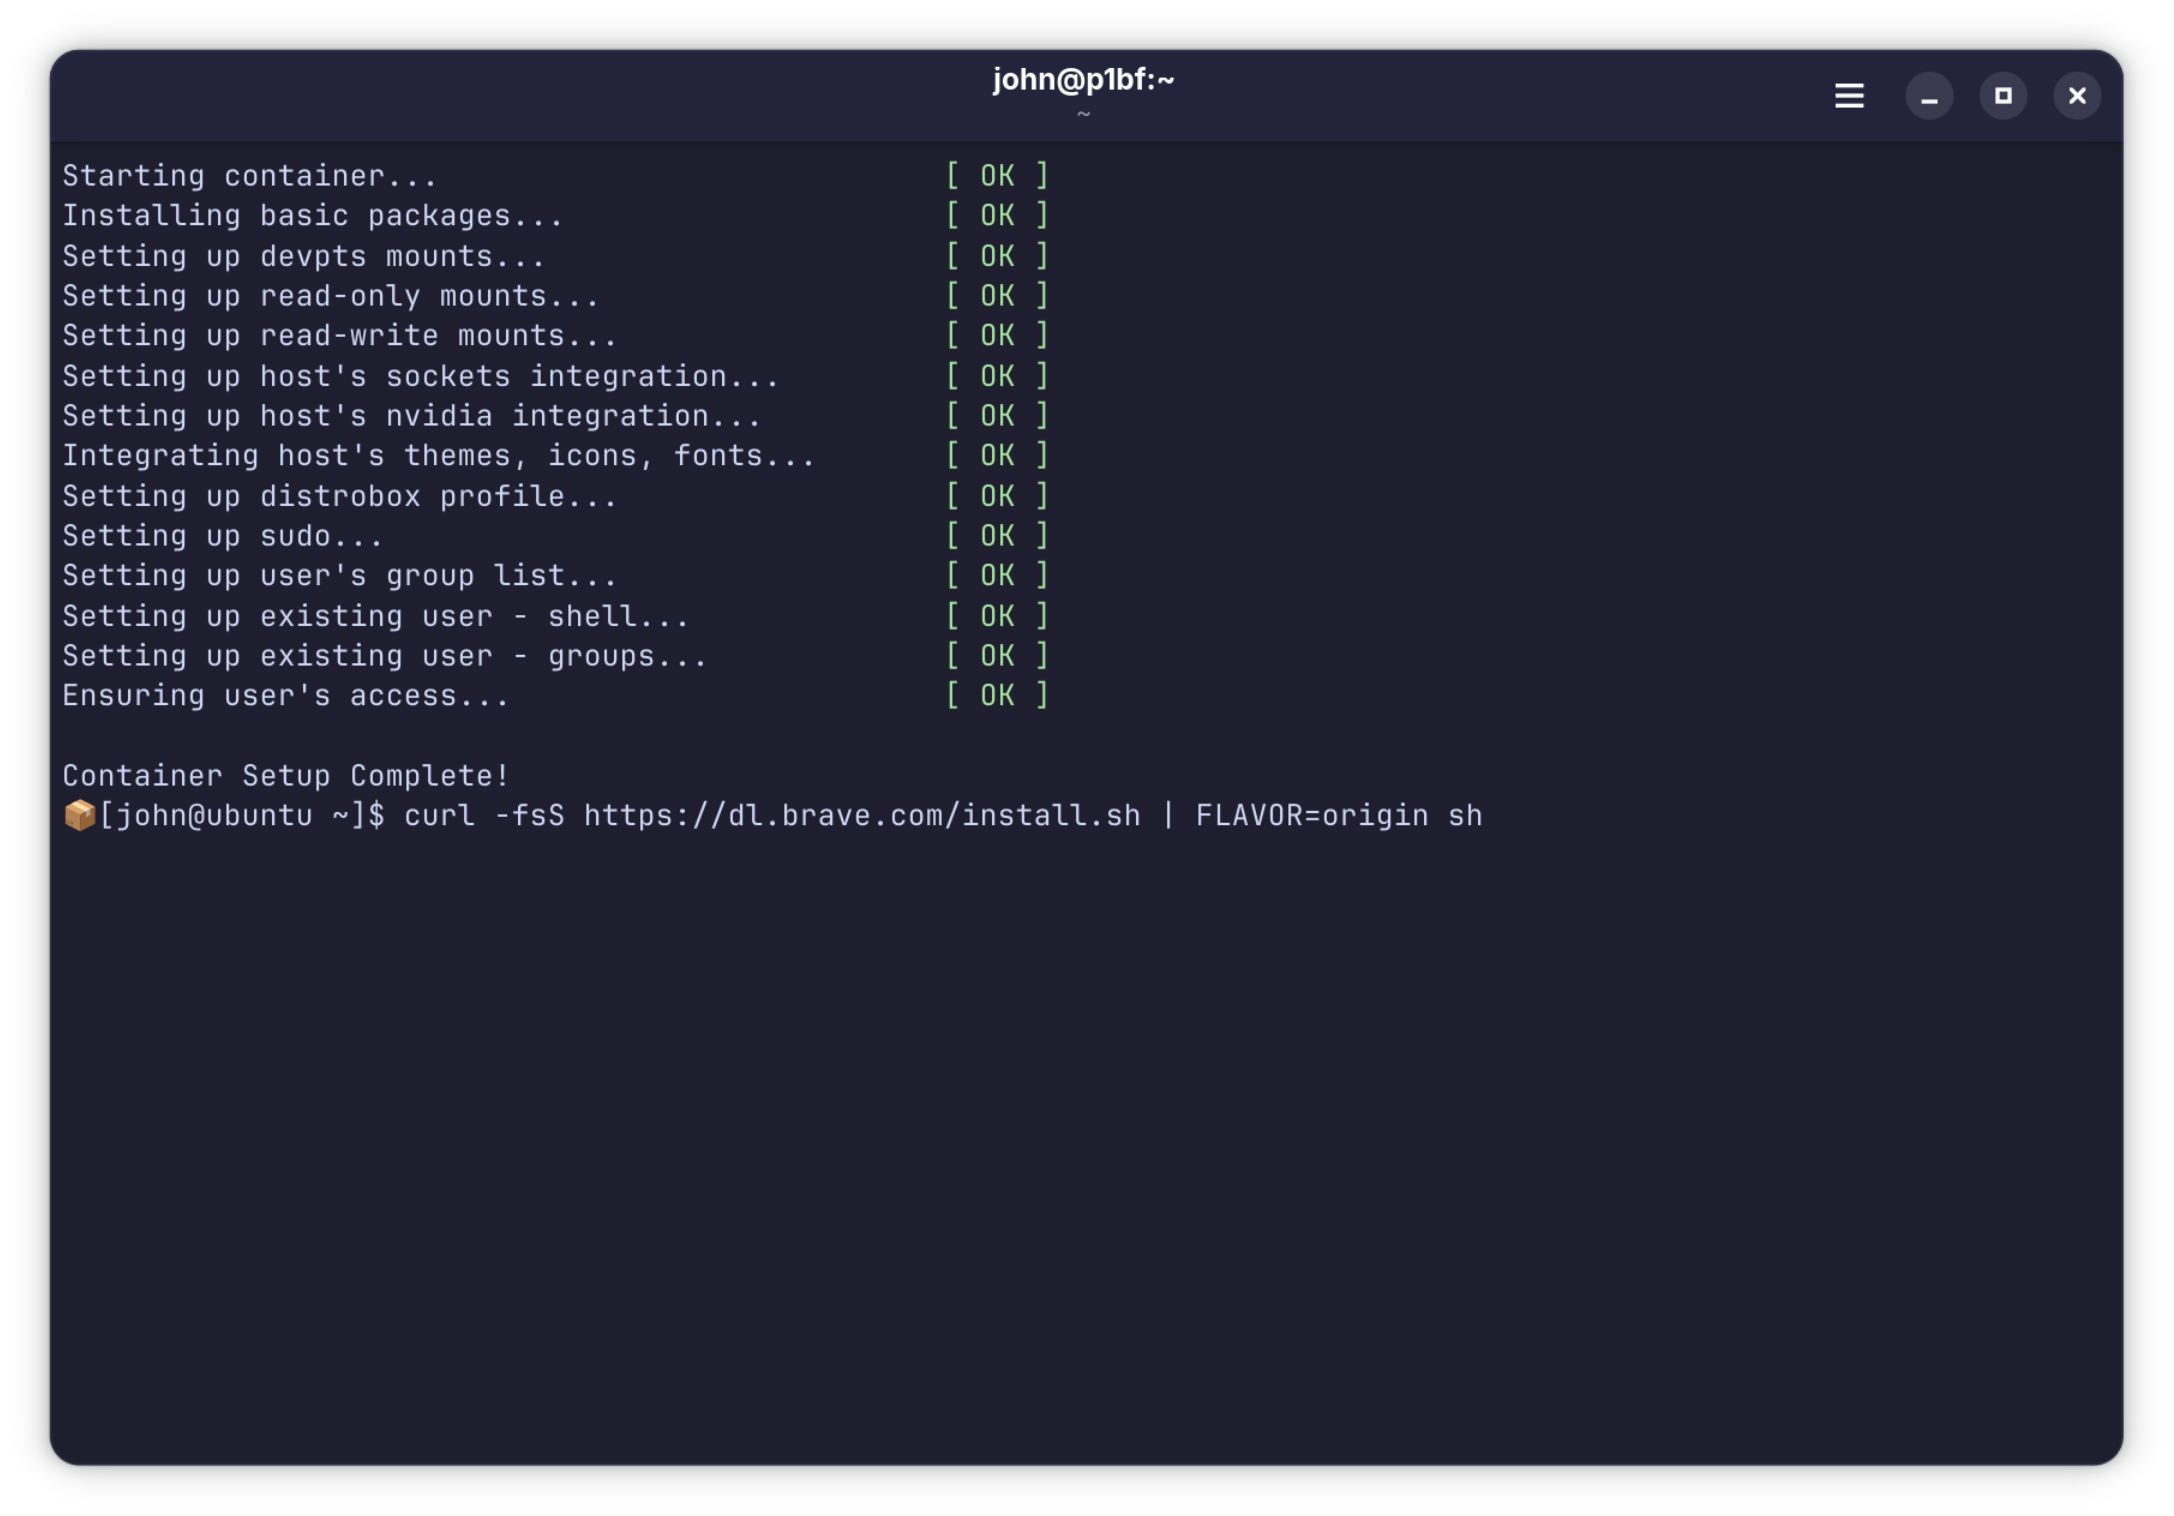
💡 Origin vs regular Brave
FLAVOR=origin installs Brave Origin (the build without
the rewards/wallet/AI extras) and gives you a brave-origin command. Drop
that variable and you get the standard brave-browser instead — the
rest of this guide works the same either way, just swap the name.
The script pulls in Brave and its dependencies. On a fresh Ubuntu box that's a couple hundred megabytes the first time, so give it a minute.
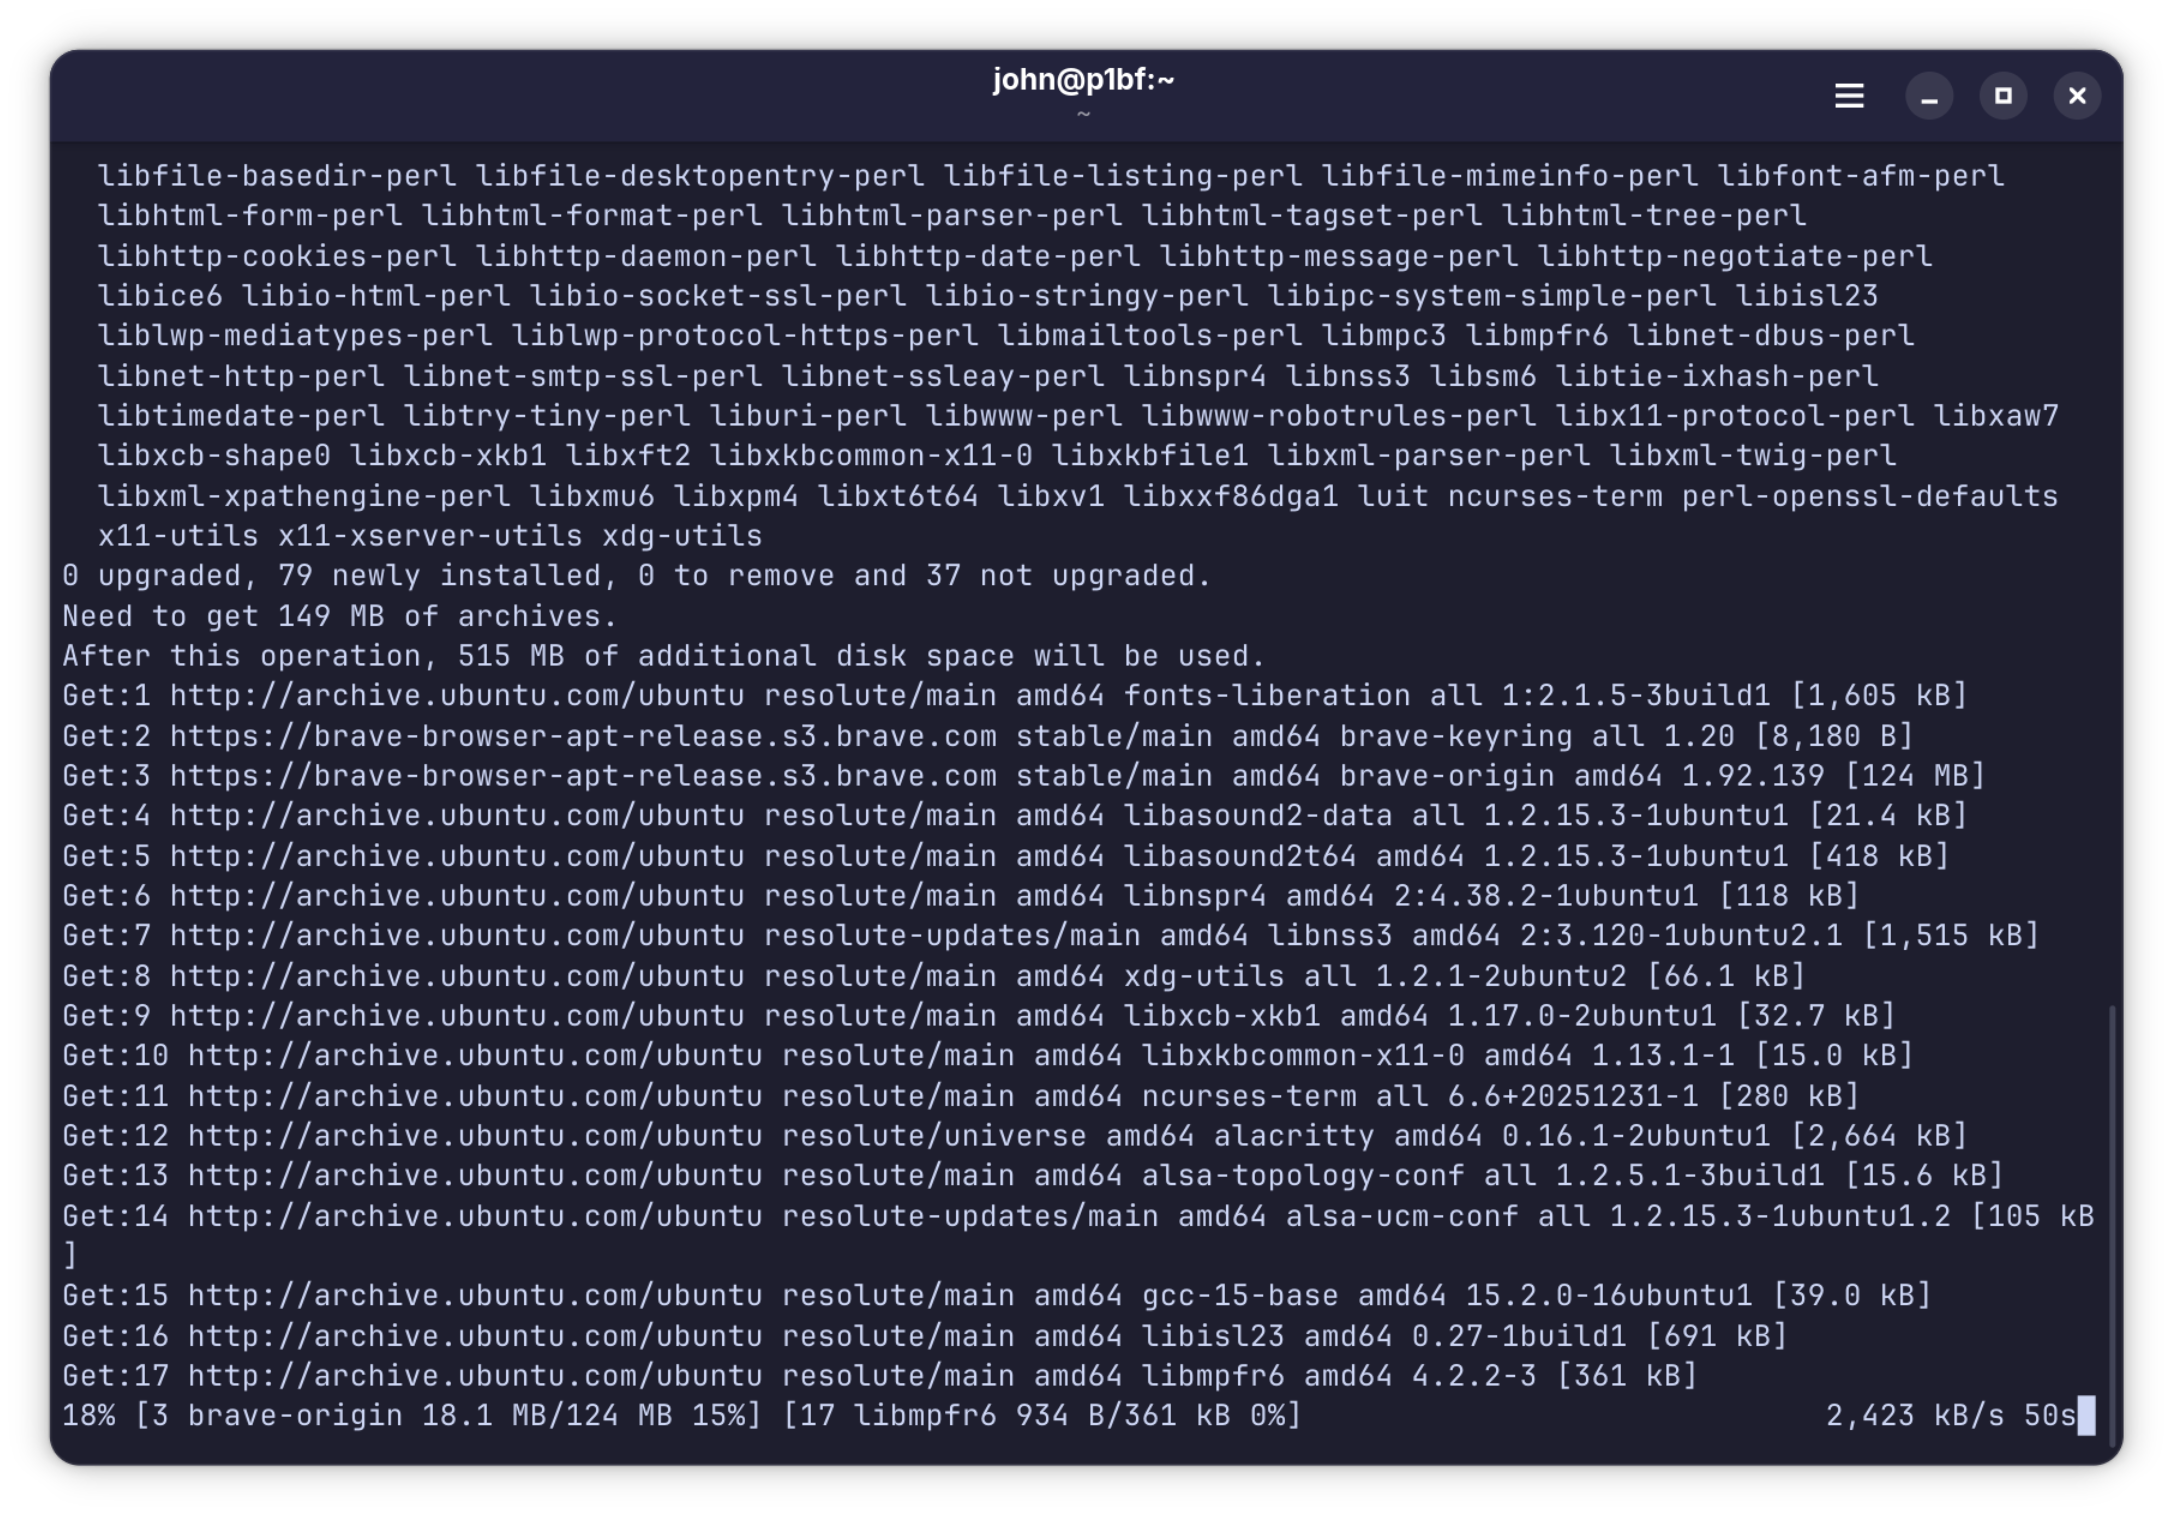
brave-origin and friends.
While you're still in the container, install one more package or the browser will have
no audio: libpulse0. Brave loads it at startup to reach your
speakers through the host's audio server, and the toolbox image doesn't include it.
$ sudo apt-get install -y libpulse0💡 Why this is separate
Distrobox already shares the host's audio socket into the container, so there's no permission to grant — Brave just needs the PulseAudio client library present to use it. Chromium-based browsers load it dynamically, so if it's missing they run happily but silently.
When it finishes it tells you exactly how to launch it. Try it from the container shell to confirm the window comes up, then close it — next we'll make it a proper desktop app.
$ brave-origin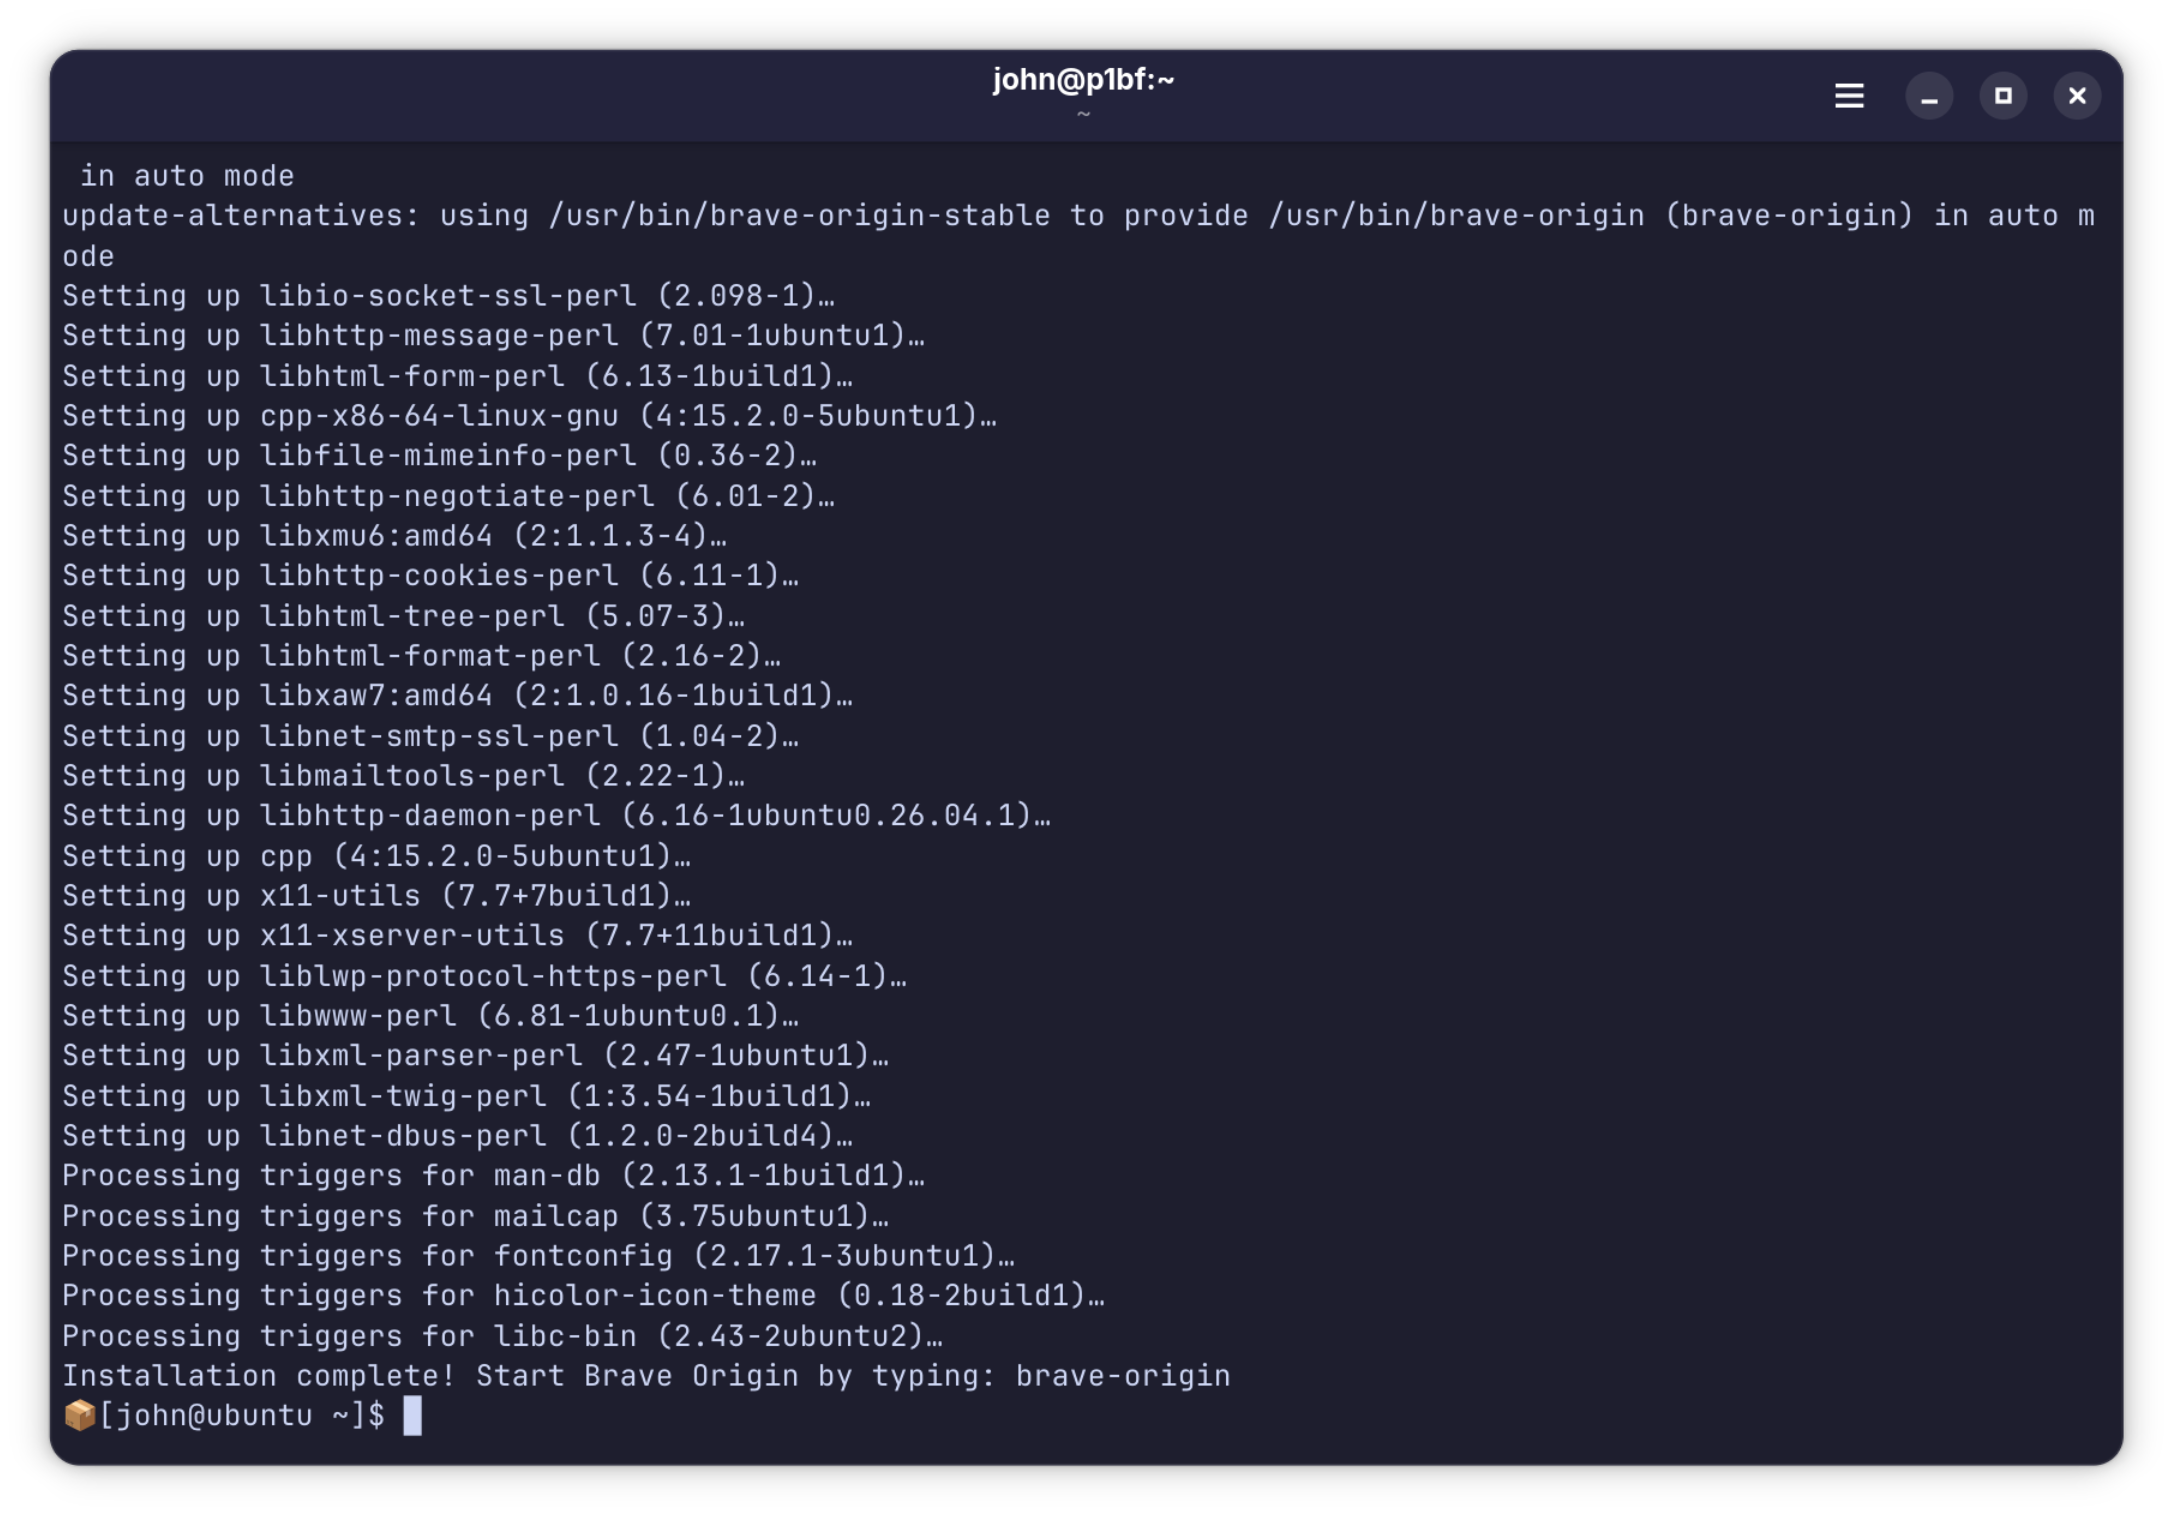
4. Export it to your desktop
Right now Brave only exists inside the container. Exporting it creates a .desktop
launcher on the host that points into the box, so it shows up in your launcher and Alt+Tab
like a native app.
GUIFrom the Containers app
On the container's Overview, open Applications ("Manage exportable applications"), find Brave in the list, and toggle it on. That's the same export, just without the terminal.
CLIFrom inside the container
$ distrobox-export --app brave-originOnce exported, Brave turns up in:
- GNOME: Activities overview, dash, app grid, Alt+Tab
- KDE Plasma: Application Launcher, task manager, KRunner
- Both: as a browser option when another app opens a link
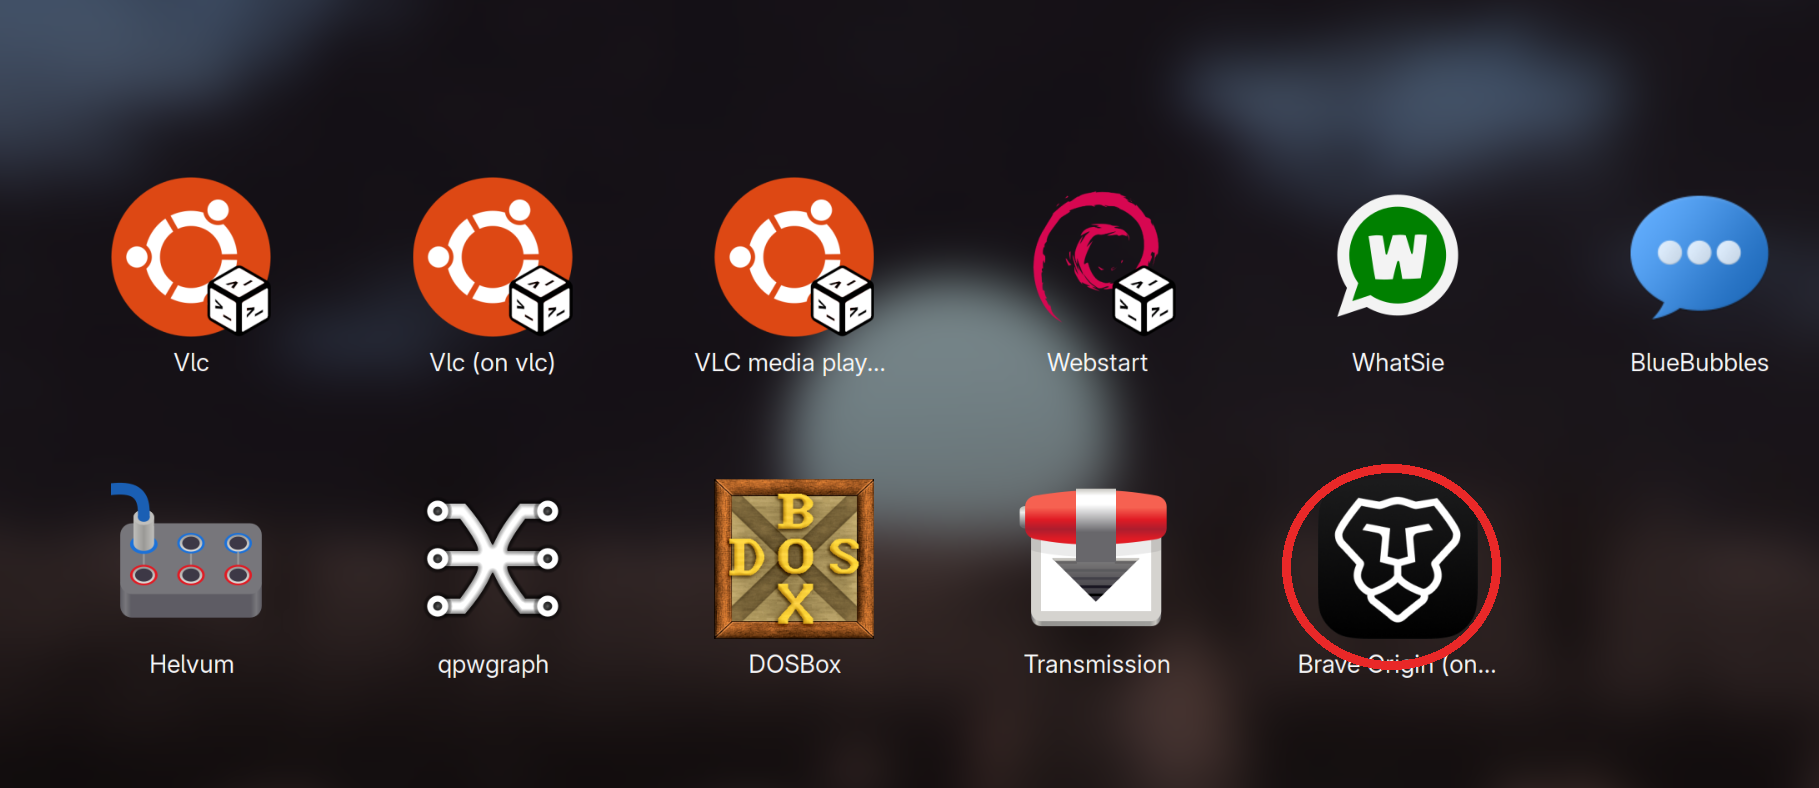
💡 distrobox-export options worth knowing
| Flag | What it does |
|---|---|
--app | Export a GUI app (creates the .desktop file) |
--bin | Export a CLI binary (wrapper script on the host PATH) |
--extra-flags | Extra launch flags, e.g. --extra-flags "--disable-gpu" |
--delete | Remove an app you exported earlier |
If you want Brave to launch with particular flags from the desktop icon (say, force a scale factor), pass them through at export time:
$ distrobox-export --app brave-origin \
  --extra-flags "--force-device-scale-factor=1.25"
KDE note: Plasma sometimes needs a log out / log in before the new launcher appears. GNOME usually picks it up right away.
5. Verify & troubleshoot
Confirm the export landed
$ ls -la ~/.local/share/applications/brave*You should see a brave-origin.desktop file.
Launch it from the host
Click the icon in your launcher, or from a host terminal:
$ distrobox enter ubuntu -- brave-originThat runs Brave without dropping you into the container shell first.
When something's off
🔇 No sound from the browser
The most common one, and it's not a permission you forgot — the container is just
missing the PulseAudio client library that Brave loads to reach your speakers. Install it
inside the container (swap ubuntu for your container's name):
$ distrobox enter ubuntu -- sudo apt-get install -y libpulse0Then fully quit and relaunch Brave — it only loads the library at startup, so a running window won't pick it up (use its menu → Quit, don't just close the window). To confirm the container can see your audio server, this should print your sink:
$ distrobox enter ubuntu -- pactl info | grep "Server Name"
Server Name: PulseAudio (on PipeWire ...)
(Installing pulseaudio-utils alongside libpulse0 gets you
pactl for that check.) The package sticks around across restarts and reboots;
you'd only reinstall it if you recreate the container.
🐞 It won't start after exporting
Run it from a terminal so you can read the error:
$ distrobox enter ubuntu -- brave-originIf it's a sandbox error, re-export with the flag added:
$ distrobox-export --app brave-origin --extra-flags "--no-sandbox"🐞 sudo: unable to resolve host
Cosmetic. Silence it from inside the container:
$ sudo sed -i '/127.0.1.1/d' /etc/hosts
$ echo "127.0.1.1 $(hostname)" | sudo tee -a /etc/hosts
🐞 Black screen or GPU weirdness
Force software rendering — fine for everyday browsing:
$ distrobox-export --app brave-origin --extra-flags "--disable-gpu"🐞 File picker / clipboard misbehaving
Make sure the portal bits are present in the container:
$ distrobox enter ubuntu
$ sudo apt install -y xdg-utils xdg-desktop-portal
6. Keeping it updated
Brave installed itself from an APT repo inside the container, so it updates the same way everything else in the box does. From the Containers app, that's the Upgrade Container button on the Overview. From a terminal:
$ distrobox enter ubuntu
$ sudo apt update && sudo apt upgrade -y
Or as a one-liner from the host, without entering the box:
$ distrobox enter ubuntu -- sh -c 'sudo apt update && sudo apt upgrade -y'💡 Automate it
Drop a user systemd service on the host and pair it with a weekly timer:
# ~/.config/systemd/user/brave-update.service
[Unit]
Description=Update the Brave container

[Service]
Type=oneshot
ExecStart=distrobox enter ubuntu -- sh -c 'sudo apt update && sudo apt upgrade -y'
7. Removing it
Un-export the desktop launcher but keep the container:
$ distrobox enter ubuntu -- distrobox-export --app brave-origin --deleteUninstall Brave but keep the container for other things:
$ distrobox enter ubuntu -- sudo apt remove -y brave-originStop the container (it'll start again next time you use it):
$ distrobox stop ubuntuOr nuke the whole thing — container and everything in it:
$ distrobox rm ubuntuIn the GUI, that last one is Delete Container in the Overview's Danger Zone.
Quick command reference
| Action | Command |
|---|---|
| Create container | distrobox create --name ubuntu --image ghcr.io/ublue-os/ubuntu-toolbox:latest |
| Enter container | distrobox enter ubuntu |
| Install Brave Origin | curl -fsS https://dl.brave.com/install.sh | FLAVOR=origin sh |
| Export to desktop | distrobox-export --app brave-origin |
| Launch from host | distrobox enter ubuntu -- brave-origin |
| Update everything | sudo apt update && sudo apt upgrade -y |
| Remove container | distrobox rm ubuntu |
Same recipe works for anything that ships a .deb or an APT repo —
Brave Origin is just the example.